PayPeople helps to manage the data of employees very conveniently. It provides a precise and expanding application of data to help businesses make better decisions.
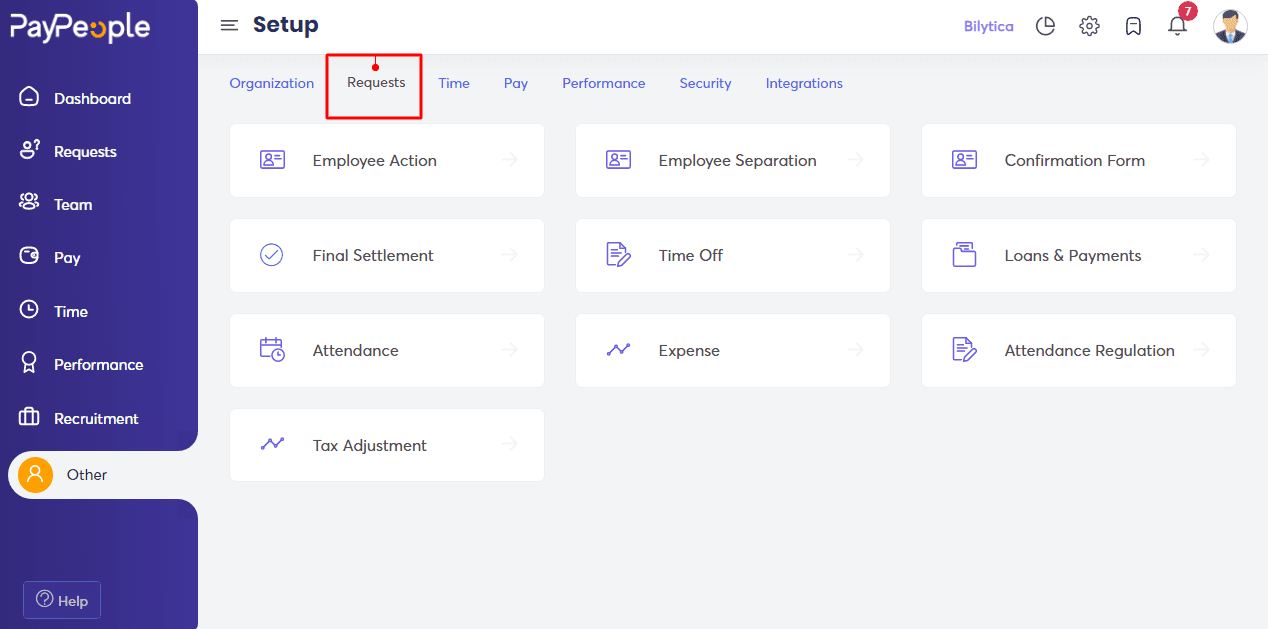
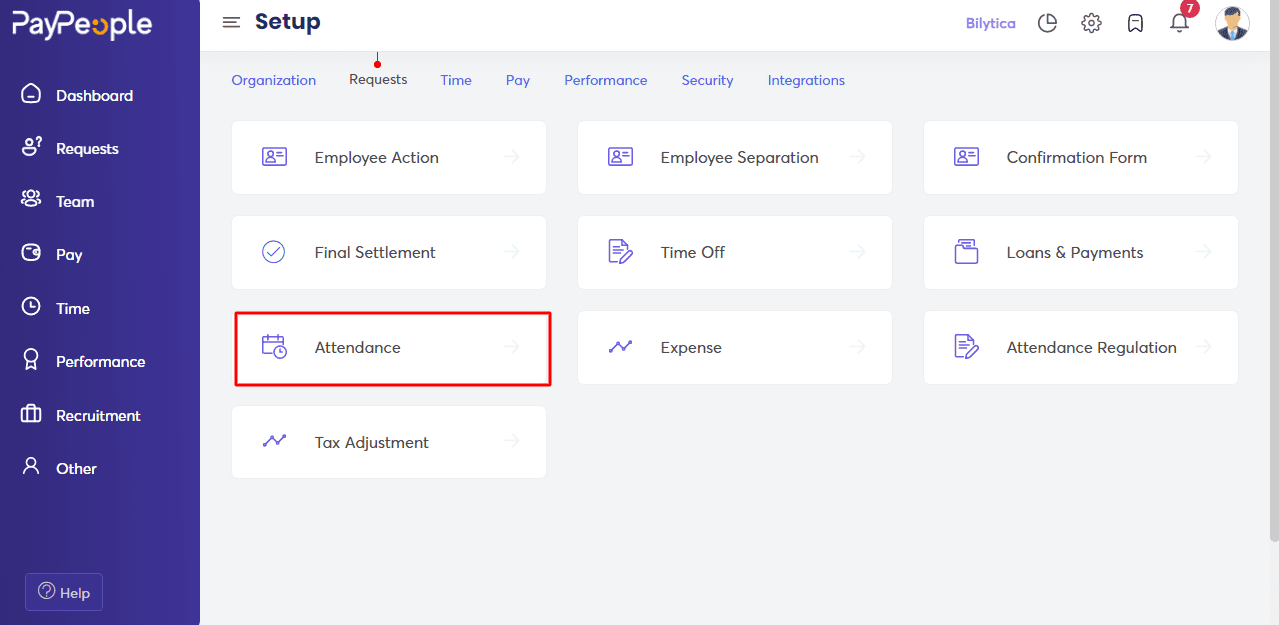
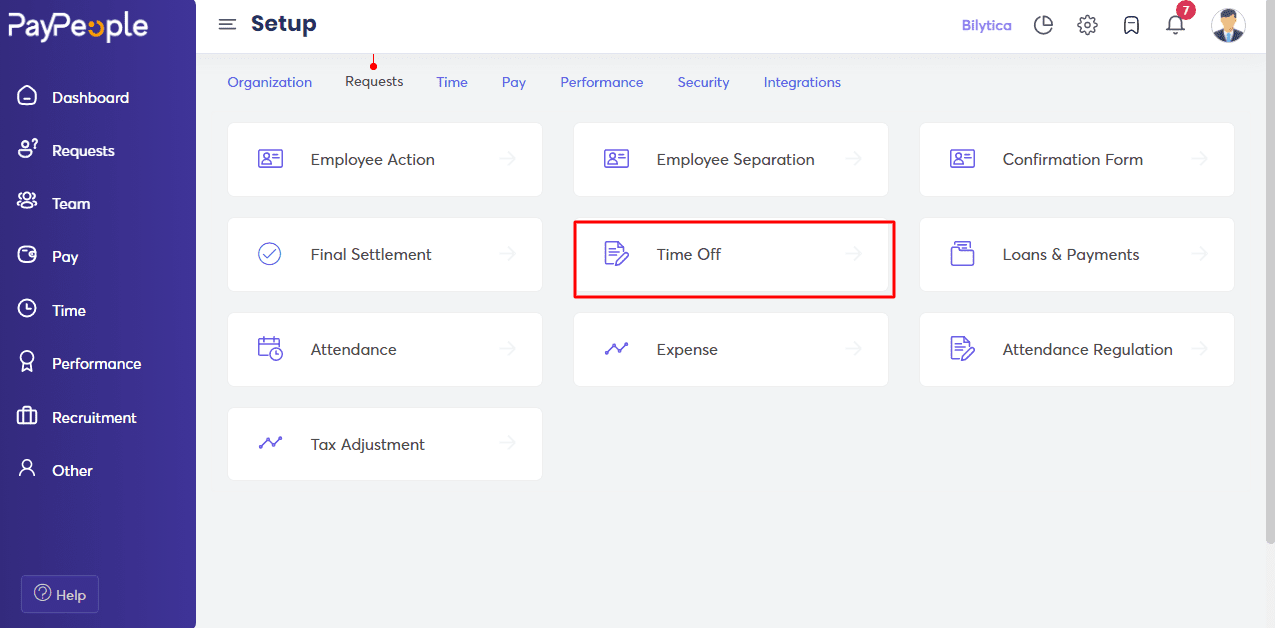
Setup > Request.
Different options are available for employee data like Employee Action and Separation.
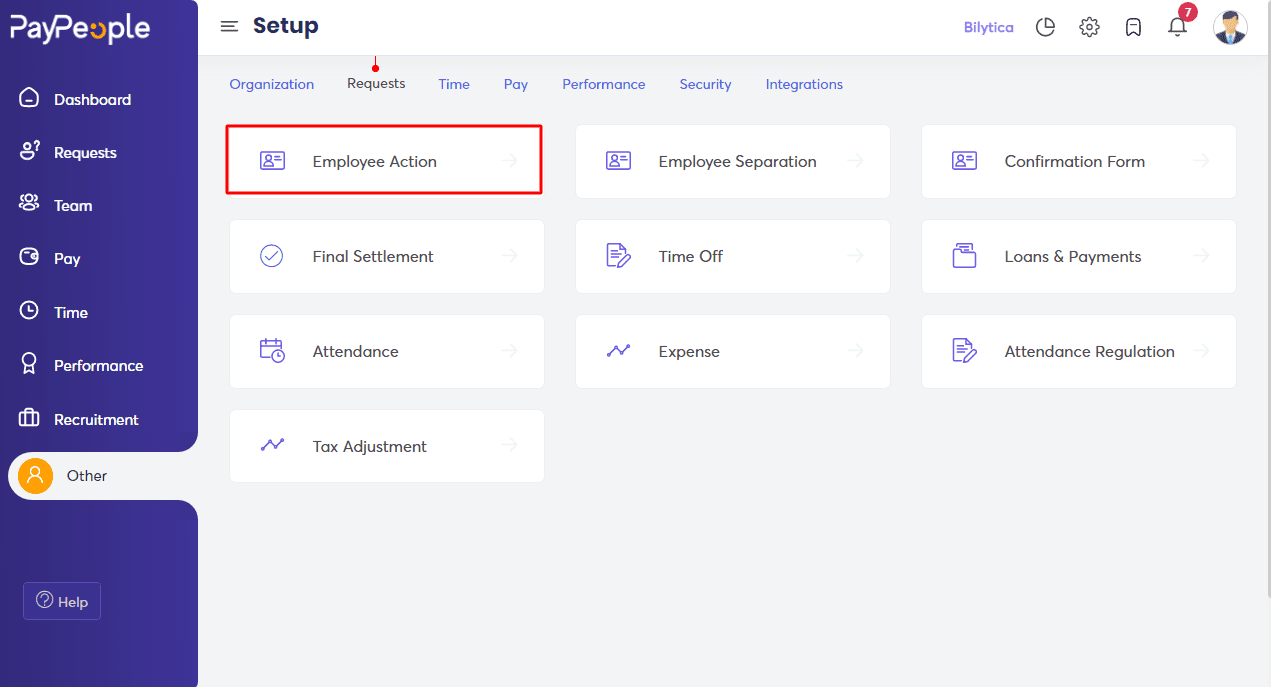
Employees Action #
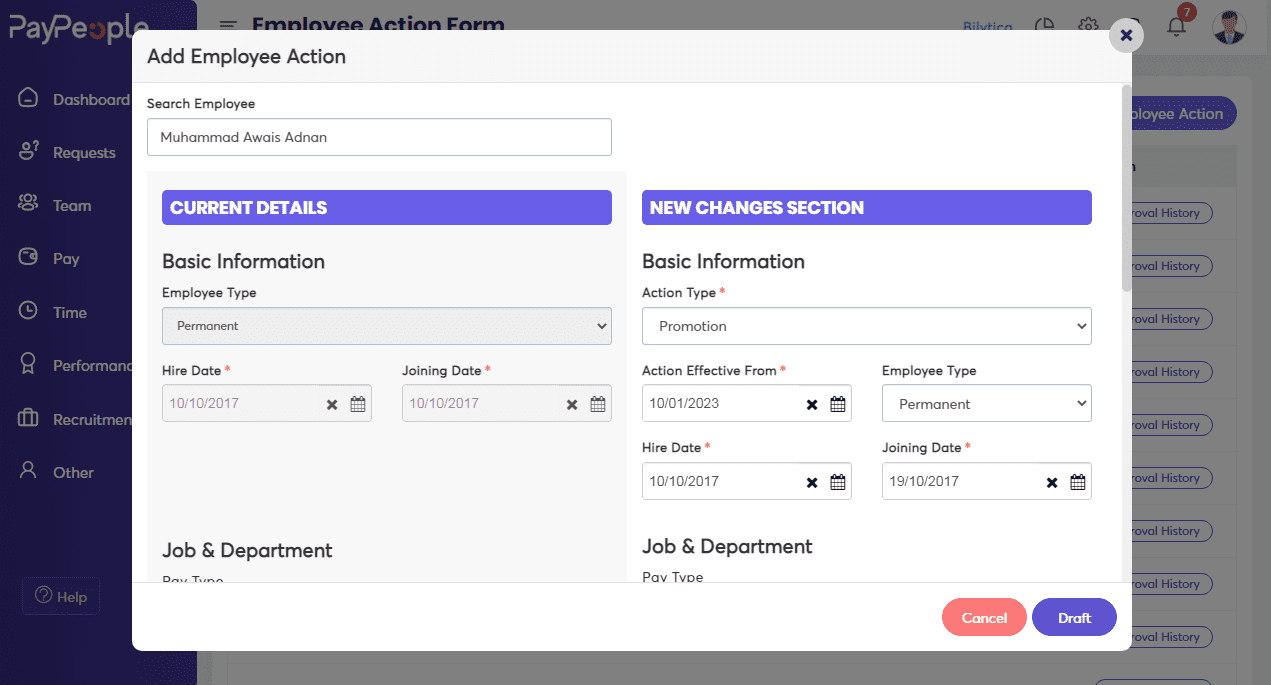
An employee action form is used to take any action that involves updating an employee’s information from previous information.
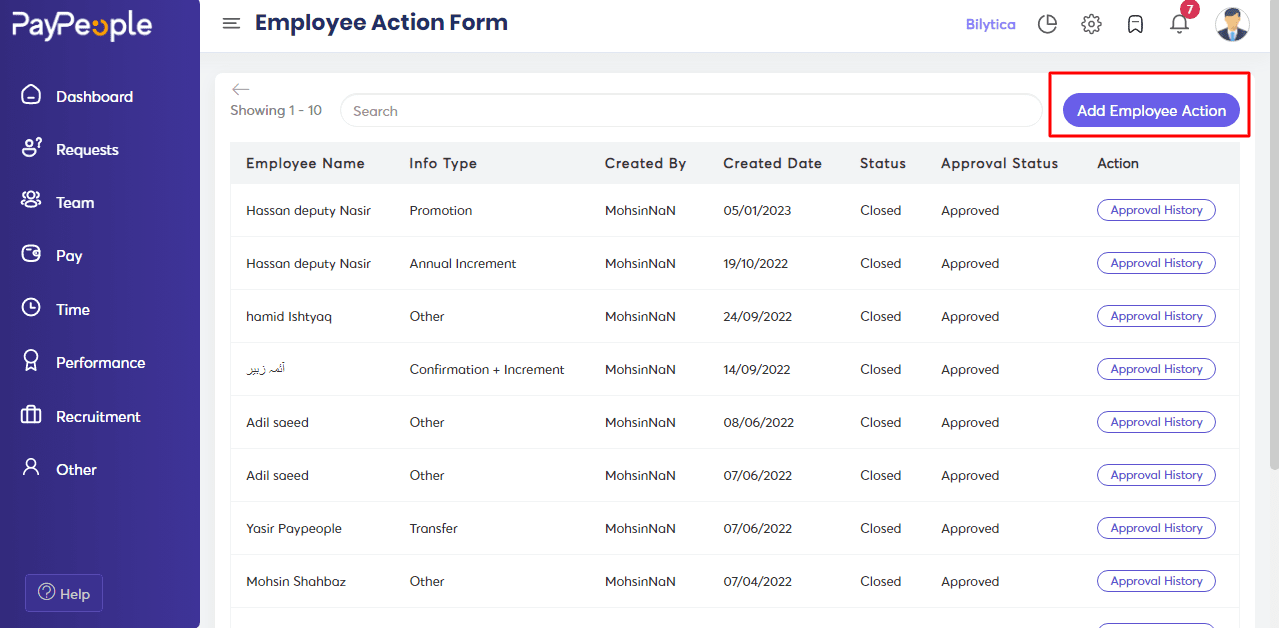
- Here you can approve the action created on the employee timeline
- Add a new employee Action form.
Click “Add Employee Action” in the top right corner to create an action.
A pop-up window will appear on the screen. Fill in the required fields.
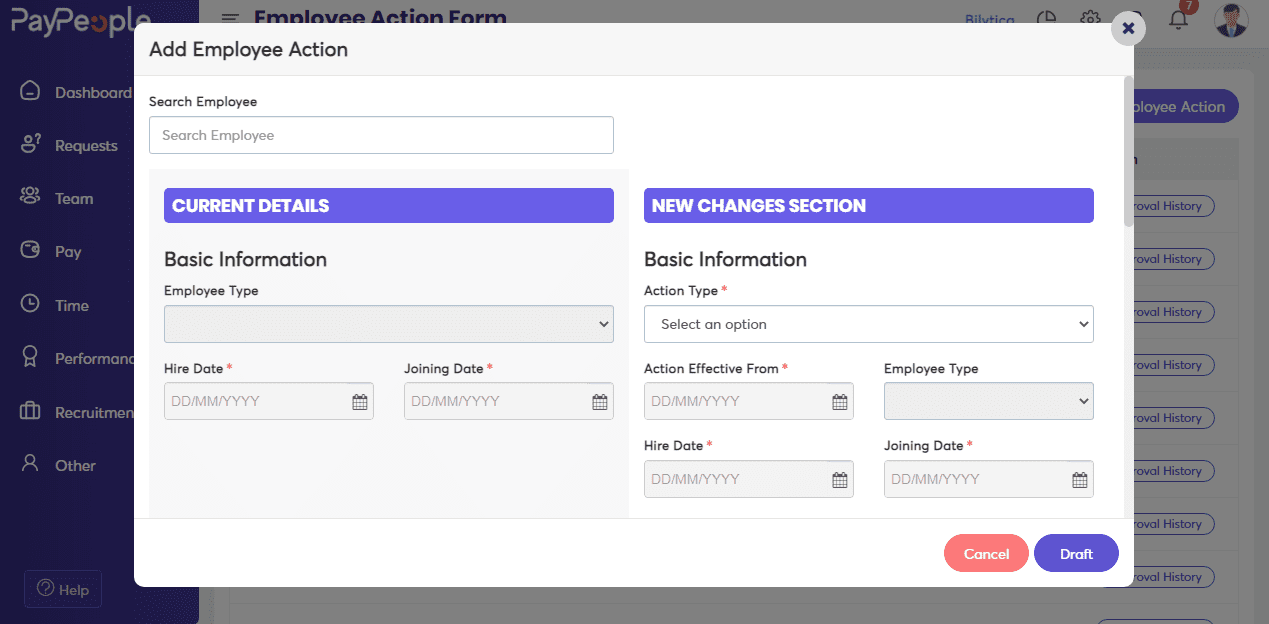
- Look up the name of the employee on whom you wish to perform an action.
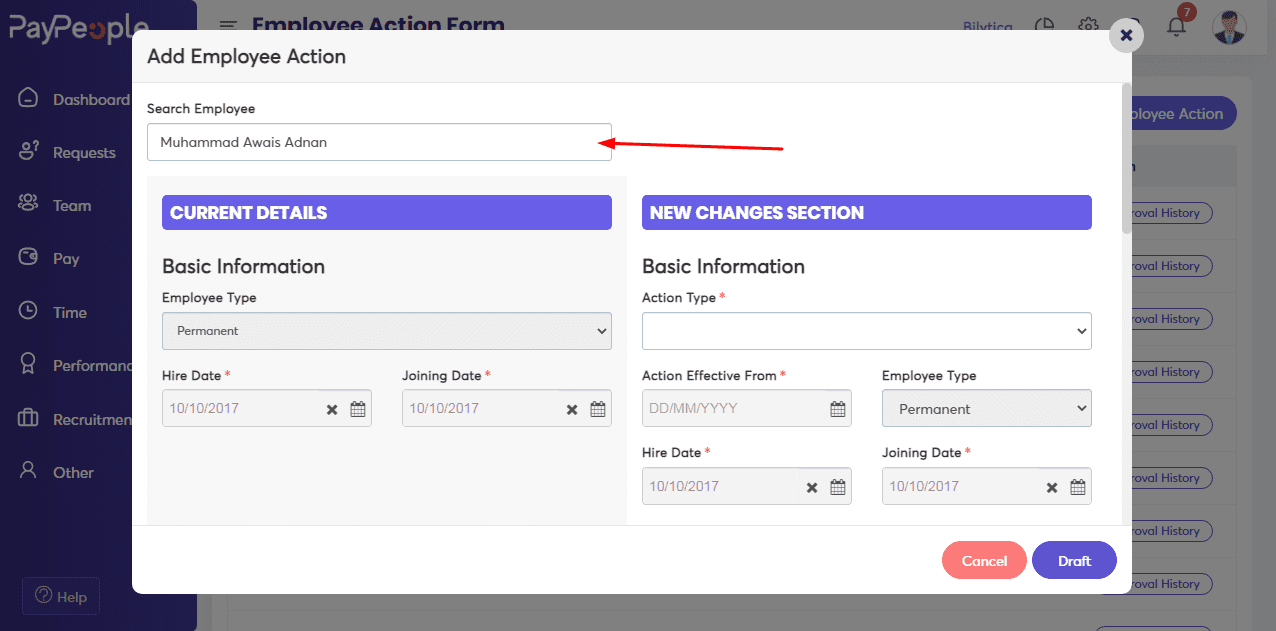
- In the Current Details Section, you may examine an employee’s current details.
- On the other hand, you can view a segment of an employee’s new changes section.
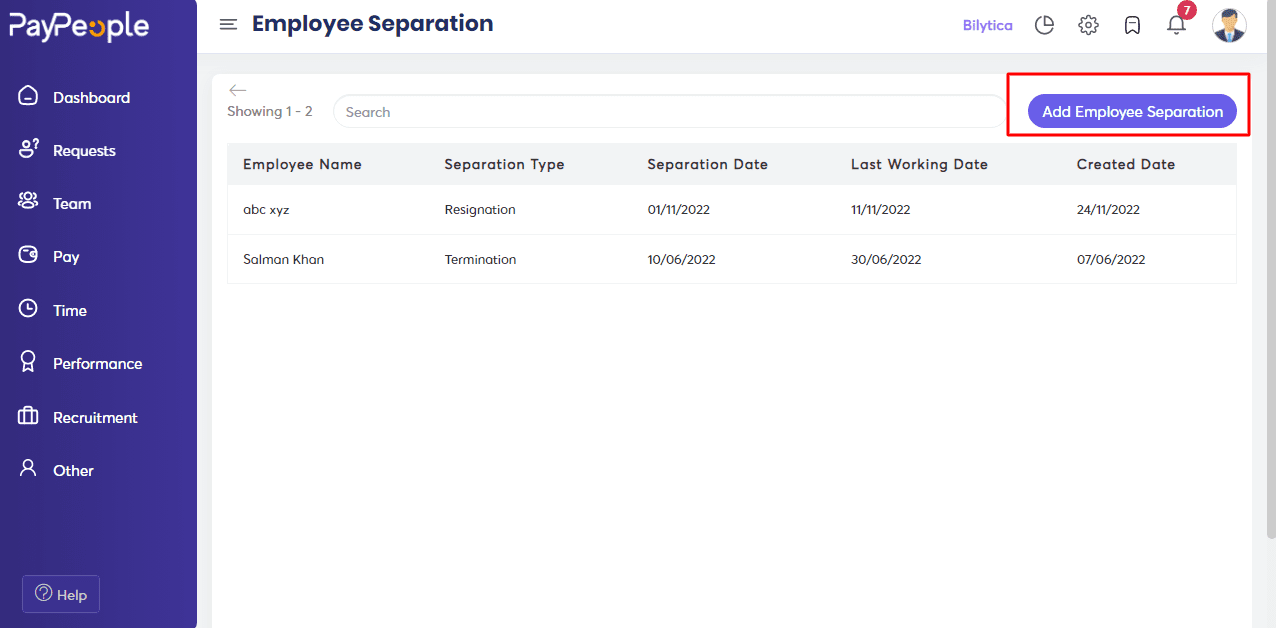
Employee Separation #
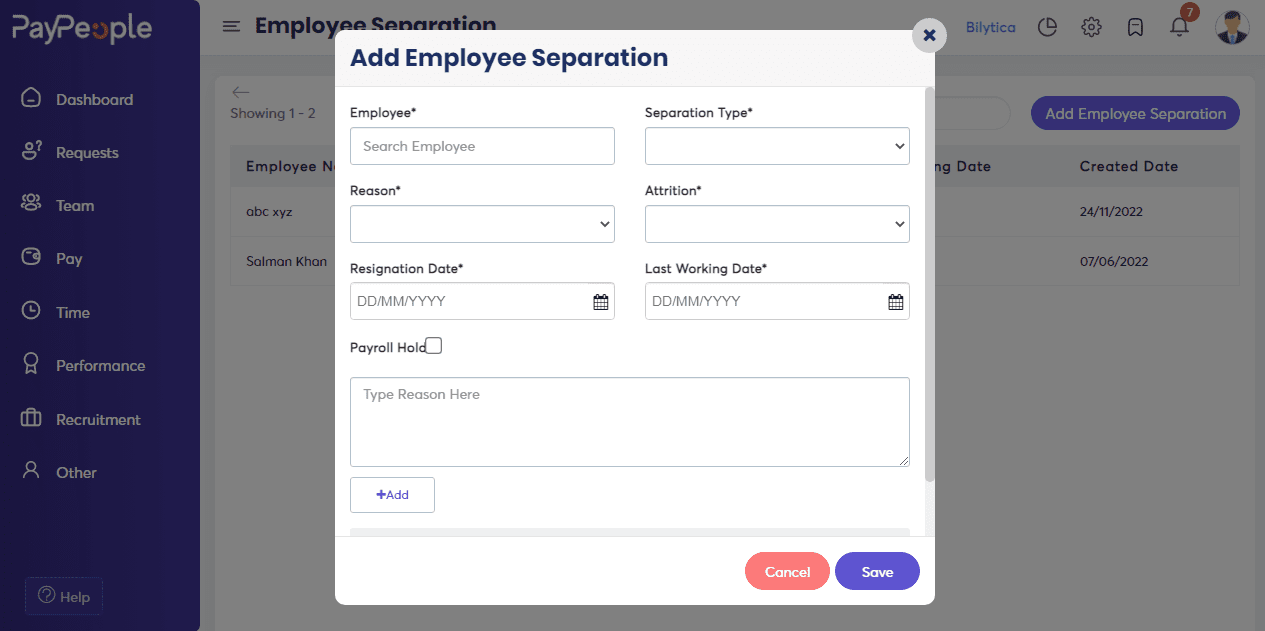
PayPeople also provides a module on Employee separation. If the employee is going to resign from the company you can add an employee separation.
What we can do here:
- Search for an employee.
- You can add separation type, reason, and attrition of separation.
- Add the date of resignation and the last working day.
- You can include the reason for the employee’s separation as well as any files related to the separation.

Click “Create a New” in the top right corner to add Employee Separation.
Fill in the required fields that appear on the screen.
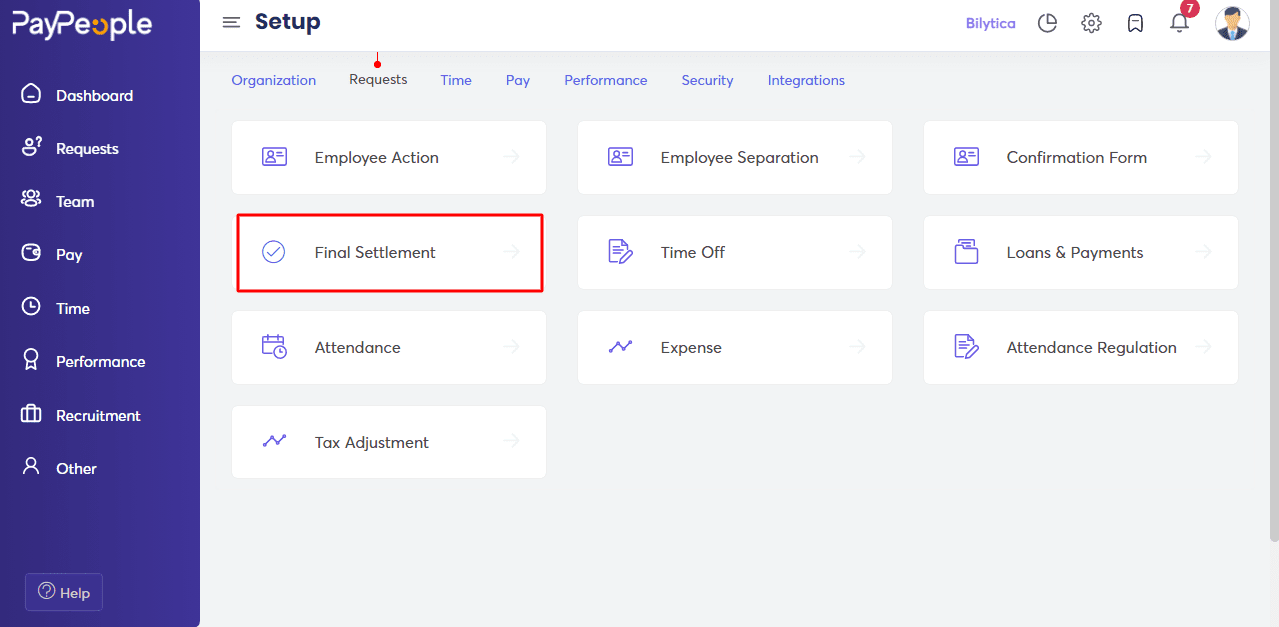
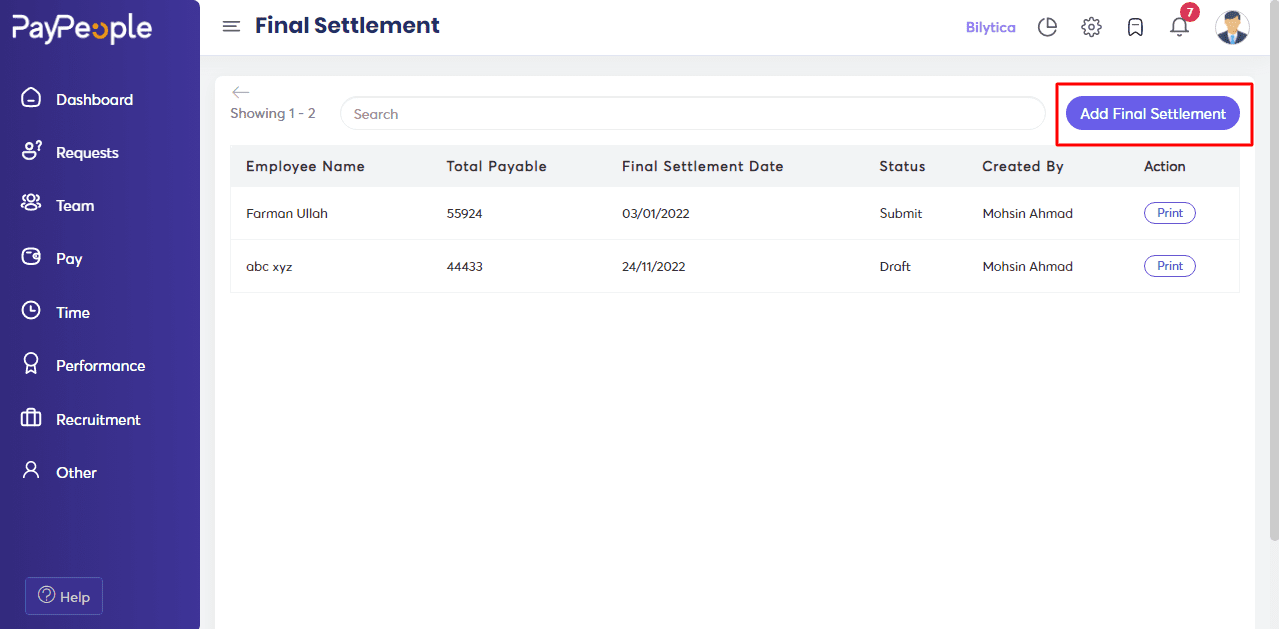
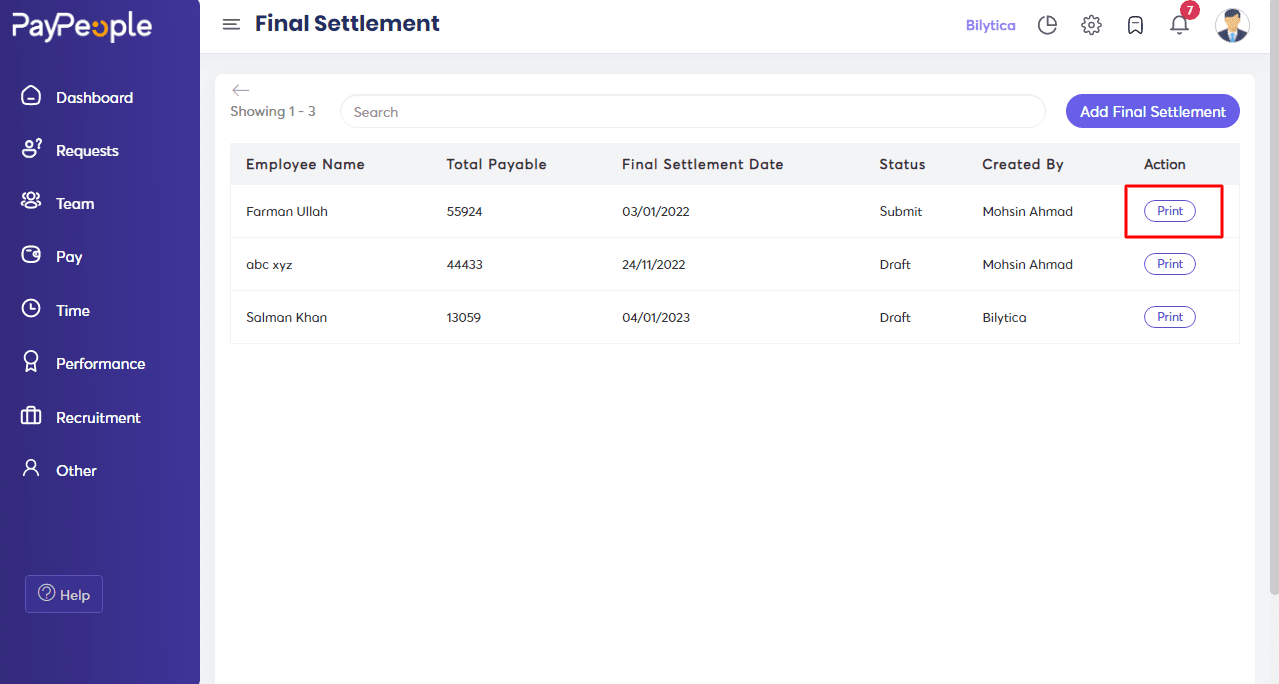
Final Settlement #
You can also add an employee settlement after you create an employee separation in the PayPeople final settlement module.
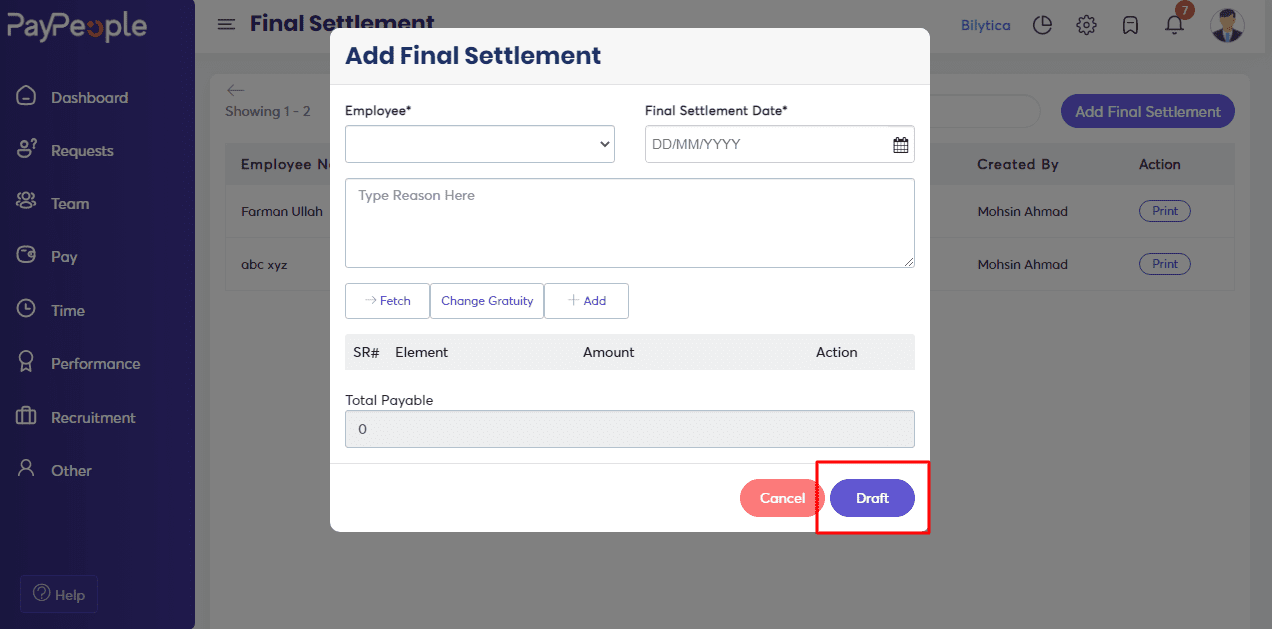
What we can do here:
- Choose the name of the employee for whom you’ve created a separation.
- Enter the date of the final settlement as well as the reason for it.
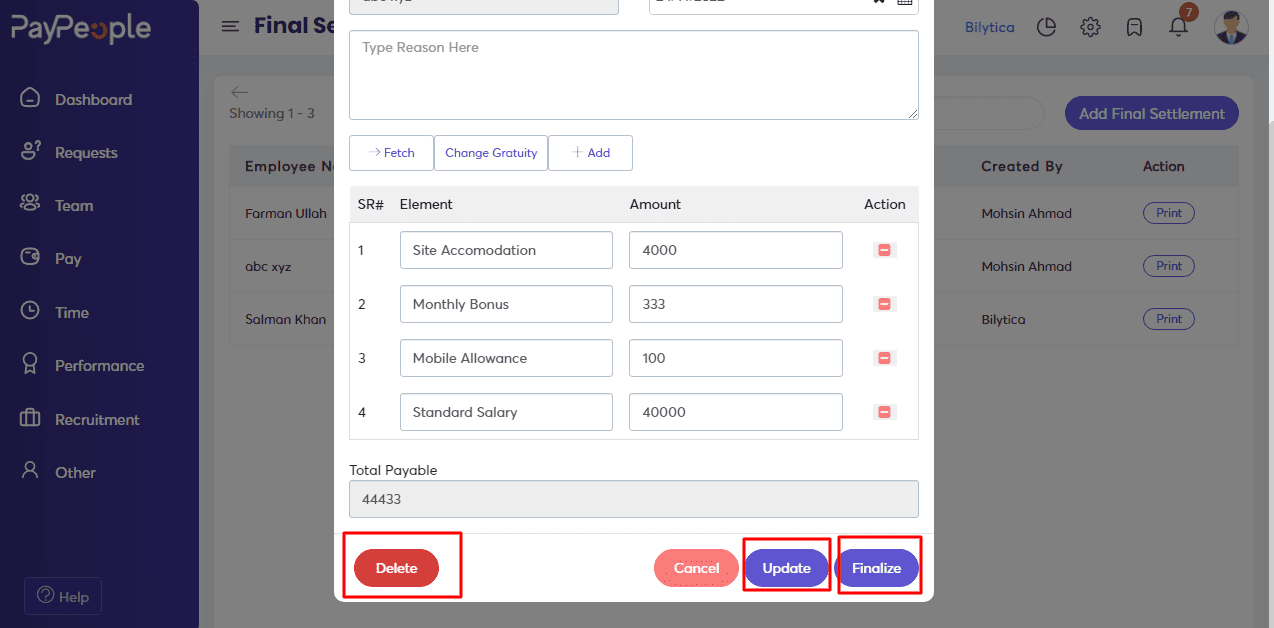
- Retrieve the employee’s elements.
- You can also manually adjust the gratuity and add elements to the employee settlement.
To create an employee’s final settlement:
- Go to Setup > Employee Data > Final Settlement.
- Click on “Add Final Settlement” in the top right corner.
- Fill in the required fields on the screen and then click Draft.
- After you’ve finished drafting the settlement, make any necessary adjustments and click Update.
- When you’re satisfied with it, click the Finalize button.
- If you want to delete the Final Settlement Click on Delete once it is drafted.
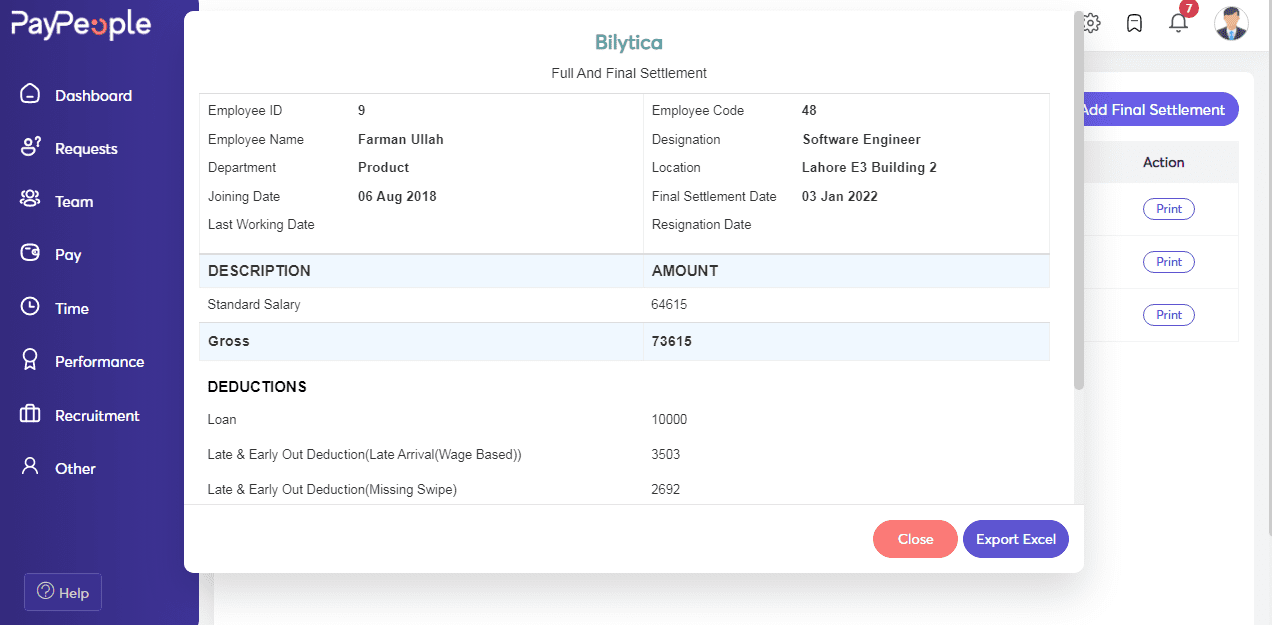
- You can print the full and final Settlement using the Print option on created settlement.
- In the end, you can export the form in Excel Sheet.
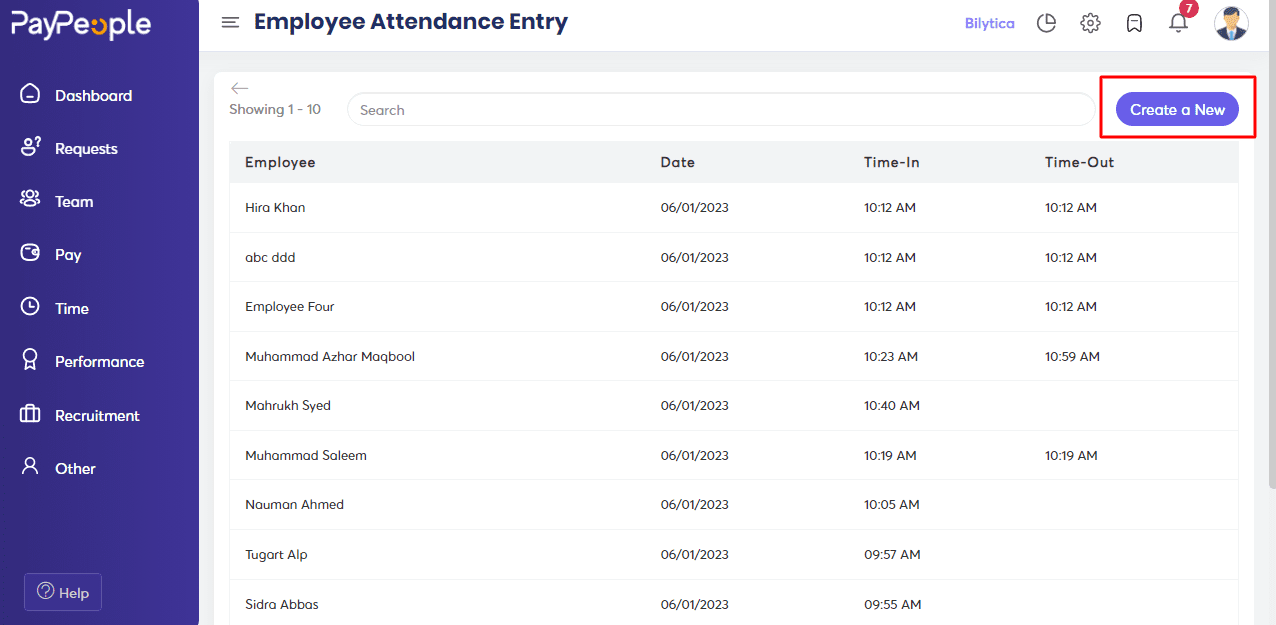
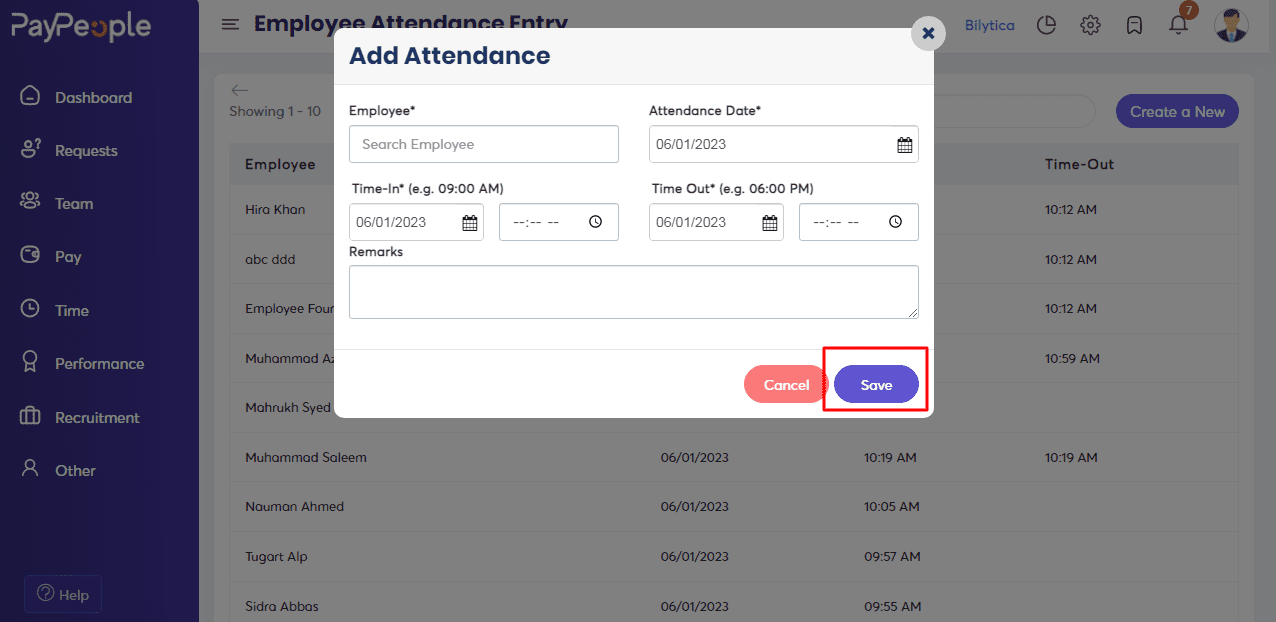
Attendance #
PayPeople provides an attendance module in employee data. You can Add, Edit, and Delete an employee’s attendance according to your requirements.
What we can do here:
- Look up the name of the employee whose attendance you want to add.
- Set the date, Time In and Time out for the employee attendance.
- Add your remarks to the Attendance you’ve added.
To Add a new Attendance:
- Go to Setup > Employee Data > Attendance.
- Click on “Create a New” in the top right corner.
- Fill in the required fields that appear on the screen and click Save.
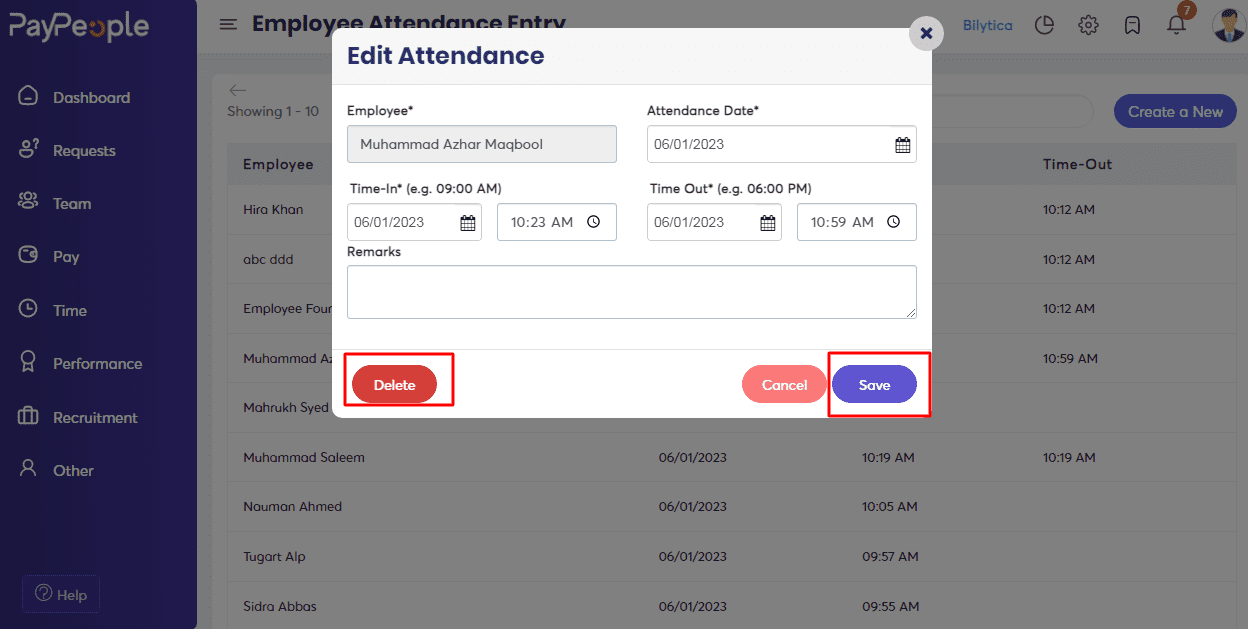
- You can also edit and delete an attendance by opening the marked attendance.
- Do the changes you want to add in attendance and click on Save.
- If you want to delete the pre-exited attendance, click on Delete.
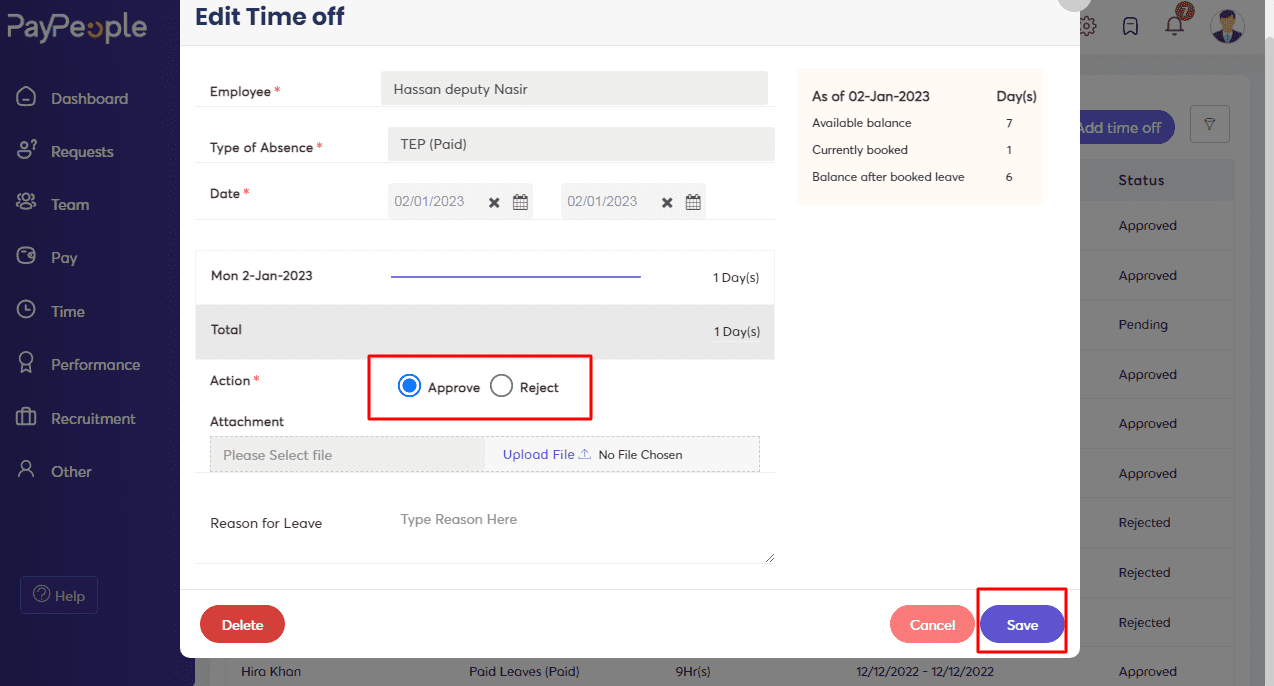
Time Off #
Managing leave is a time-consuming and important element of the HR routine. PayPeople Time off is a simple and user-friendly online Leave management module that enables you to efficiently record, manage, and track your employee’s leave details while reducing time theft.
What we can do here:
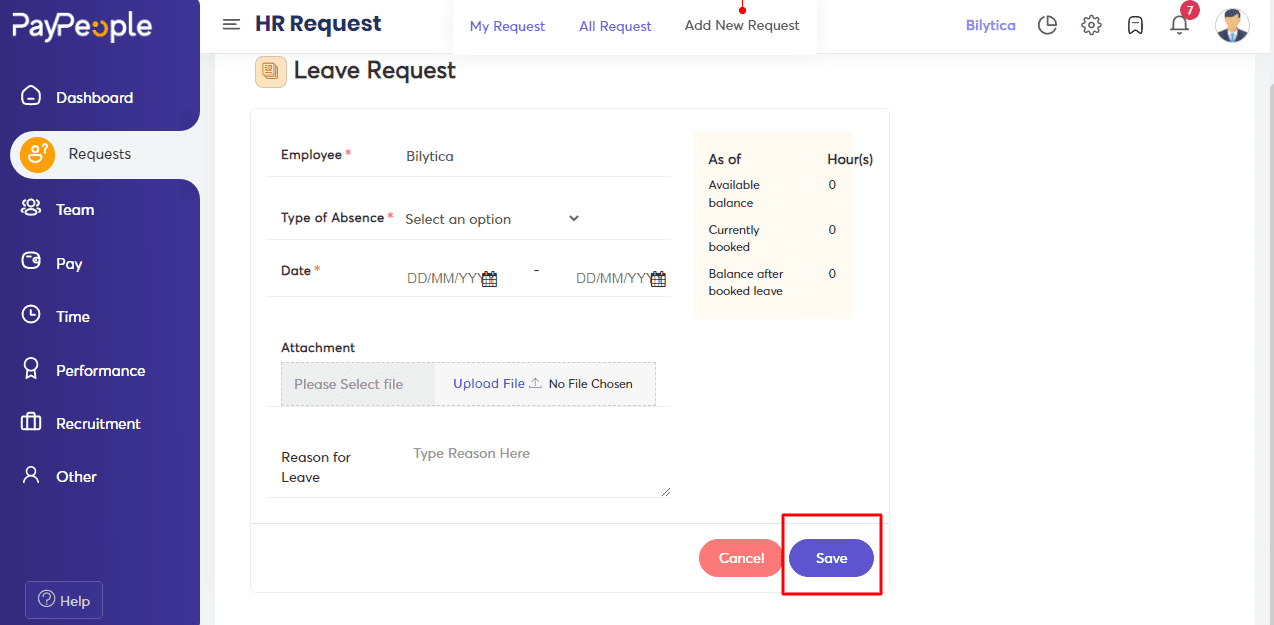
- Look up the name of the employee whose Time Off you want to add.
- Choose the type of Absence.
- Set the start and end date, and the reason for the Time Off.
To create a new Time Off:
- Go To Setup >Request > Time Off.
- Click on “+ Add Time off ” in the top right corner.
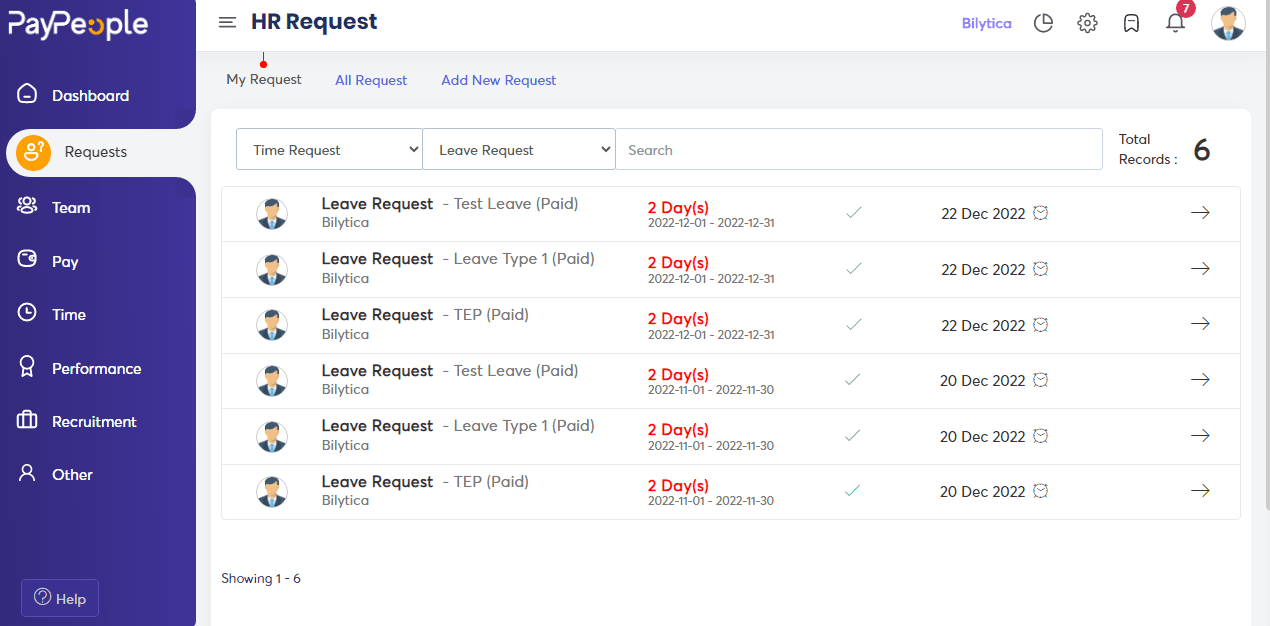
- Click on ” Add New Request“.
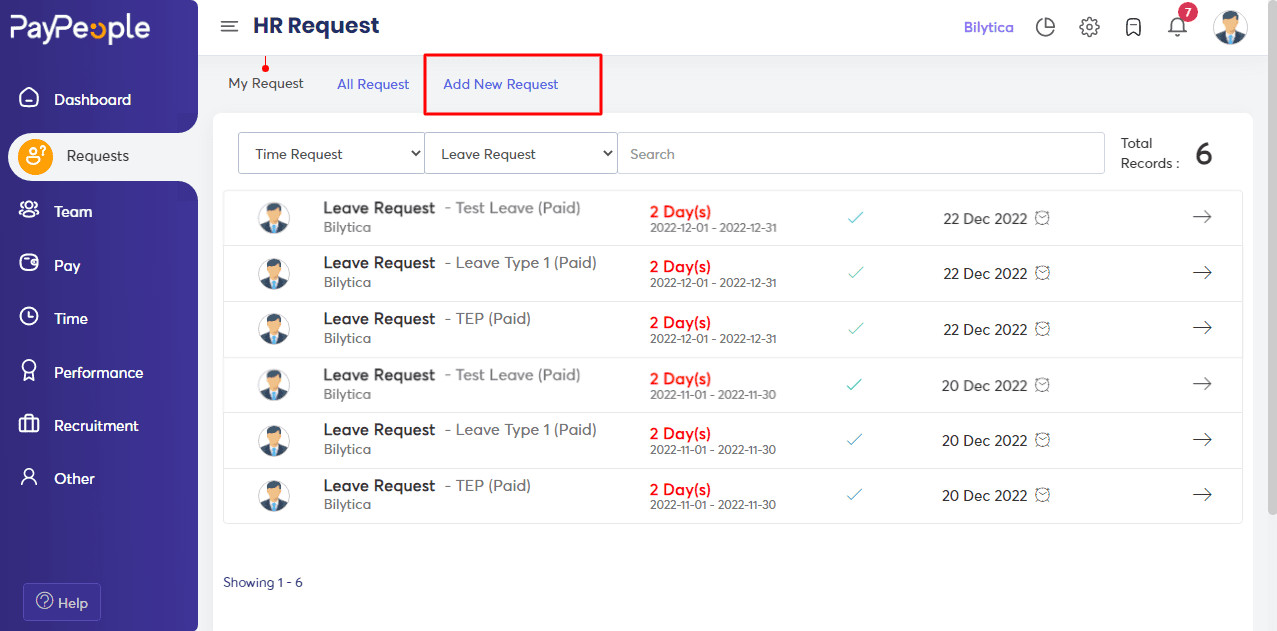
- Click on ” Leave Request”.
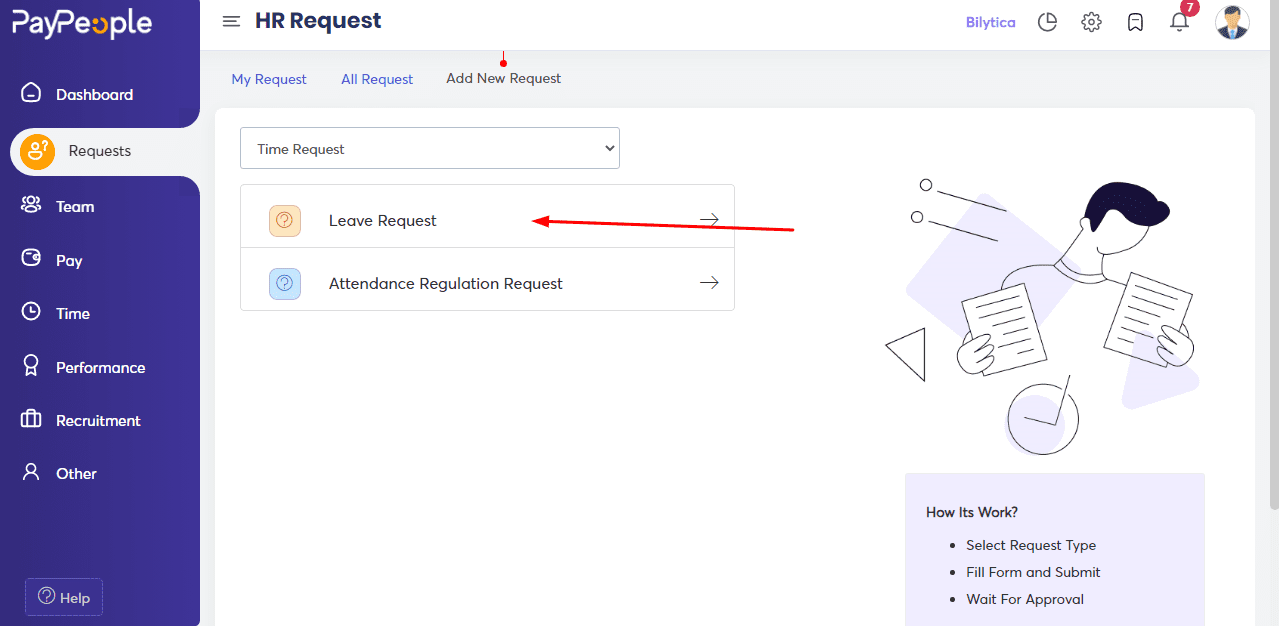
- Fill in the required fields and click on Save.
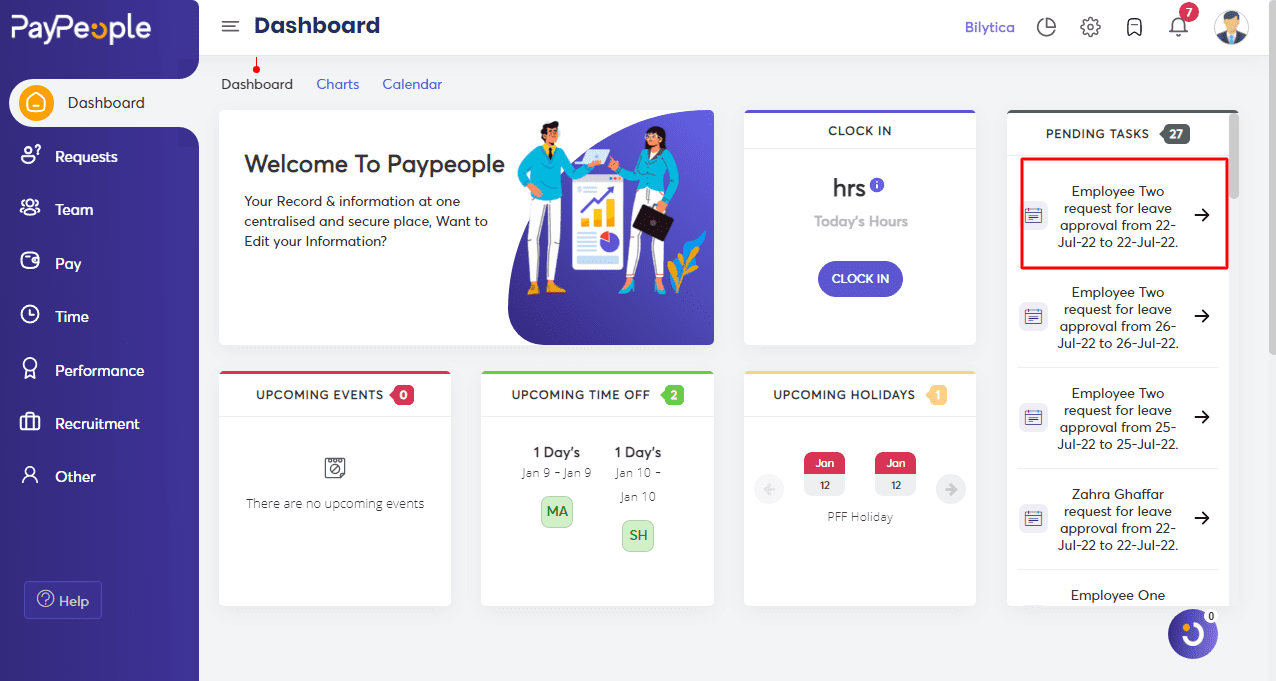
- Once you’ve created or received a request for time off from an employee, you can approve or reject it by opening the entry.
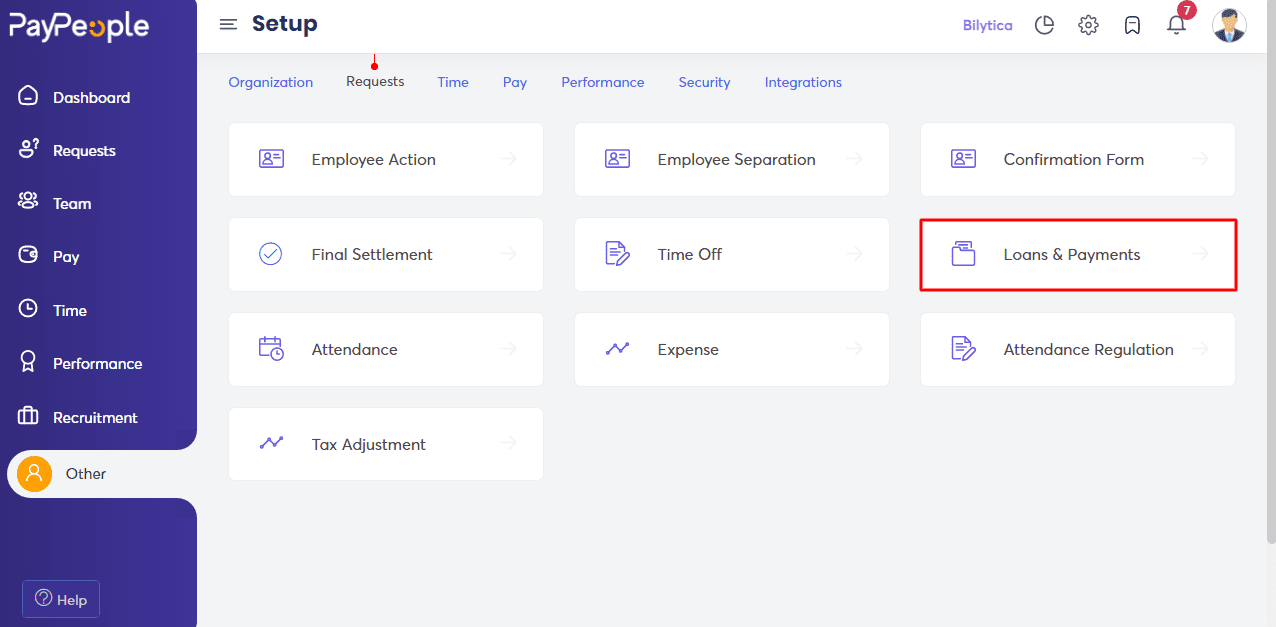
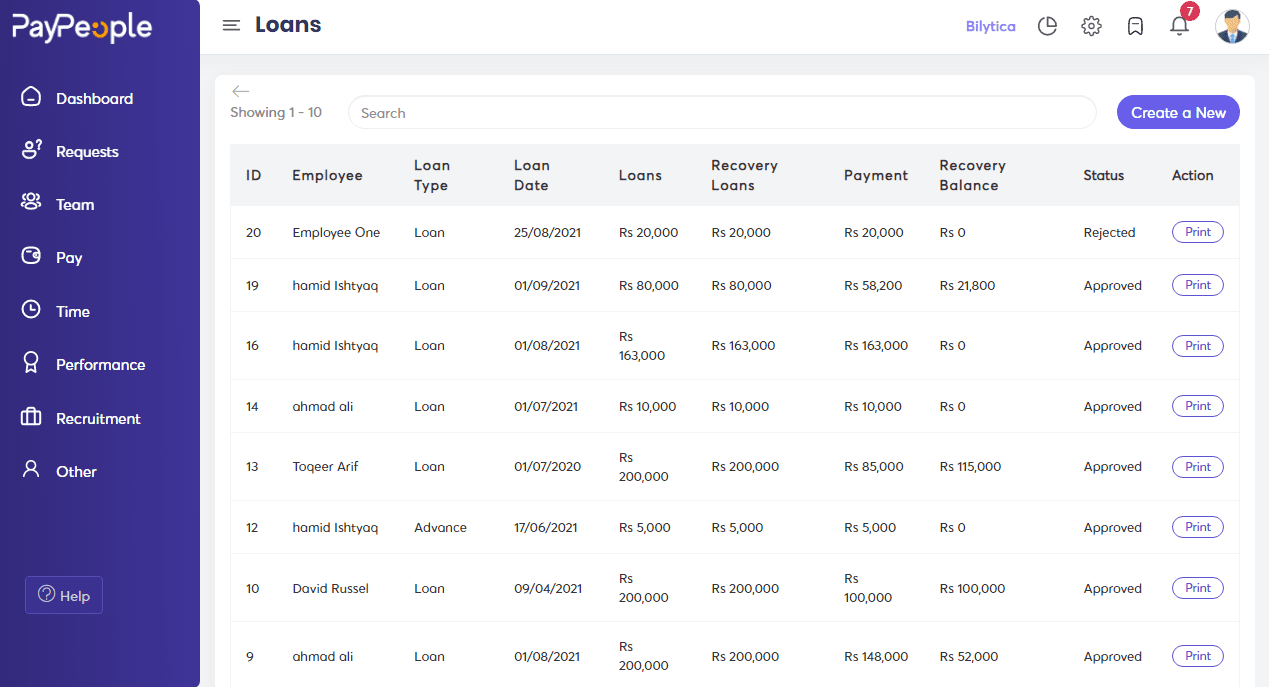
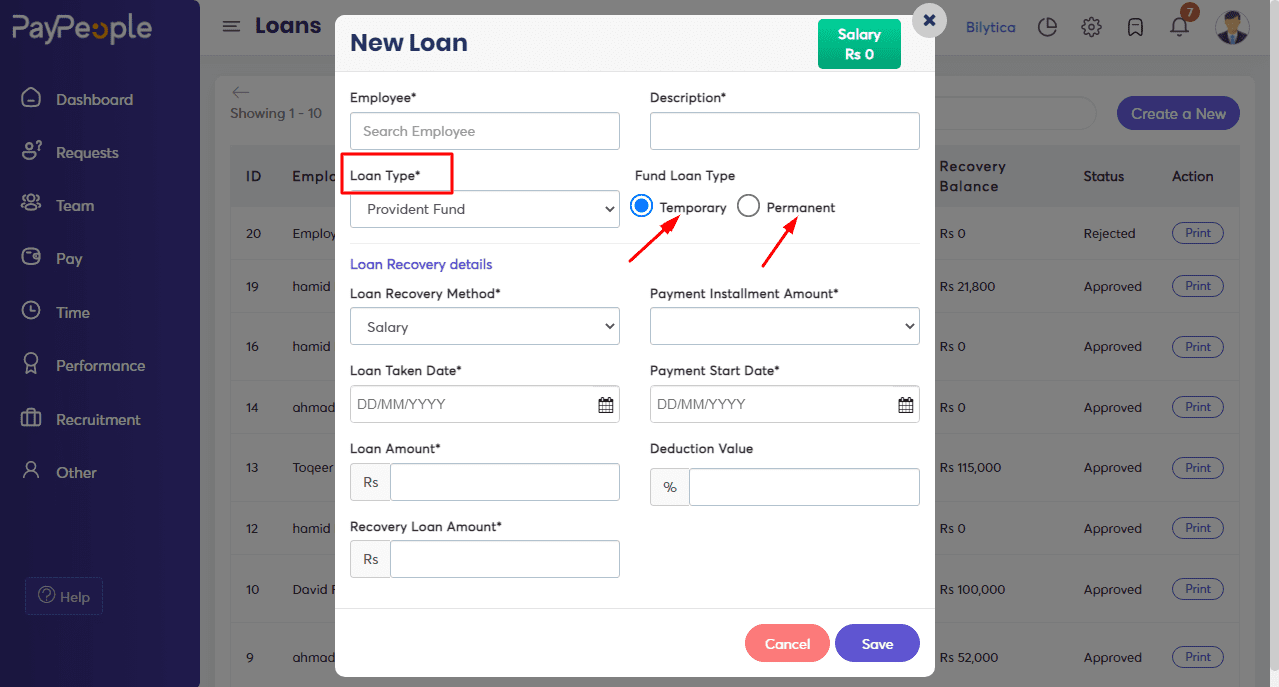
Loan and Payment #
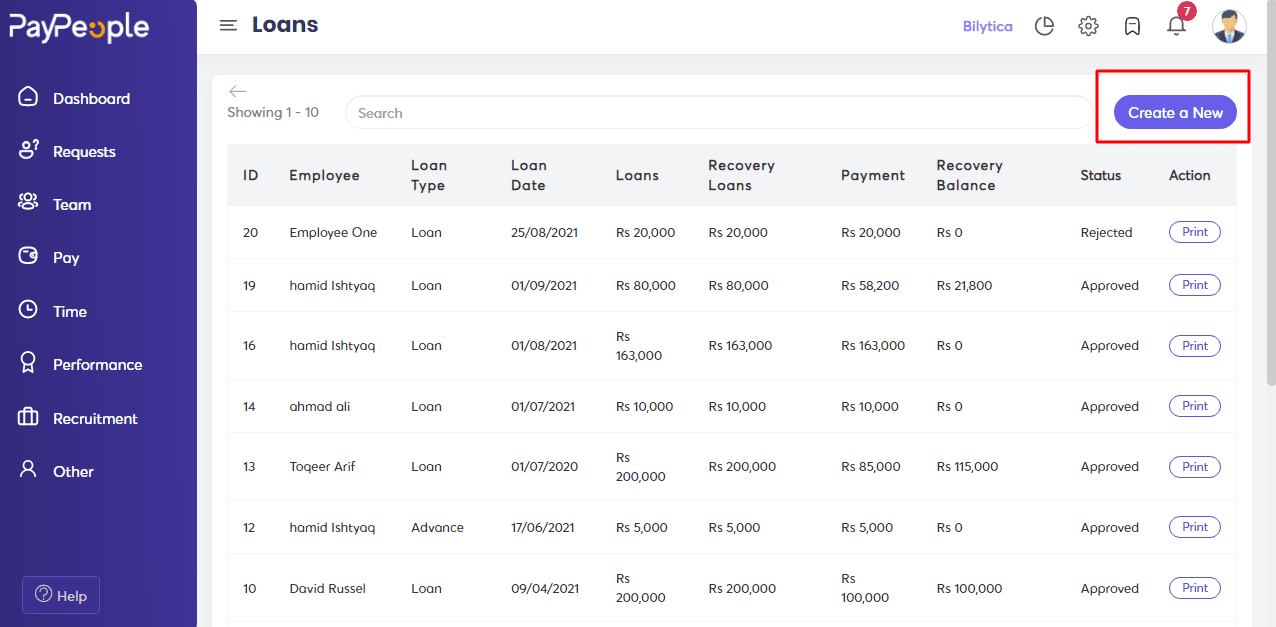
How to add a Loan? #
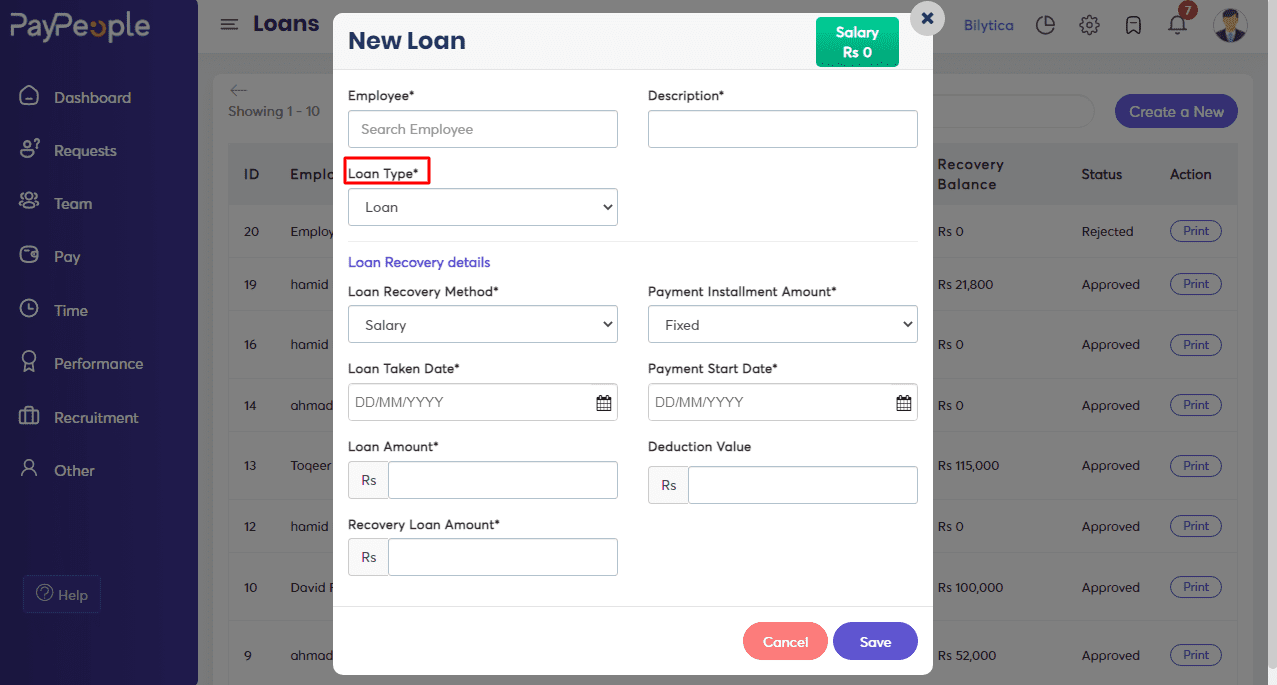
If any employee wants to apply for a Loan and advance, go to Setup>Employees Data> Loan & Payment.
- Click on “Create a New” in the top right corner.
- Fill in the required fields that appear on the screen and click Save.
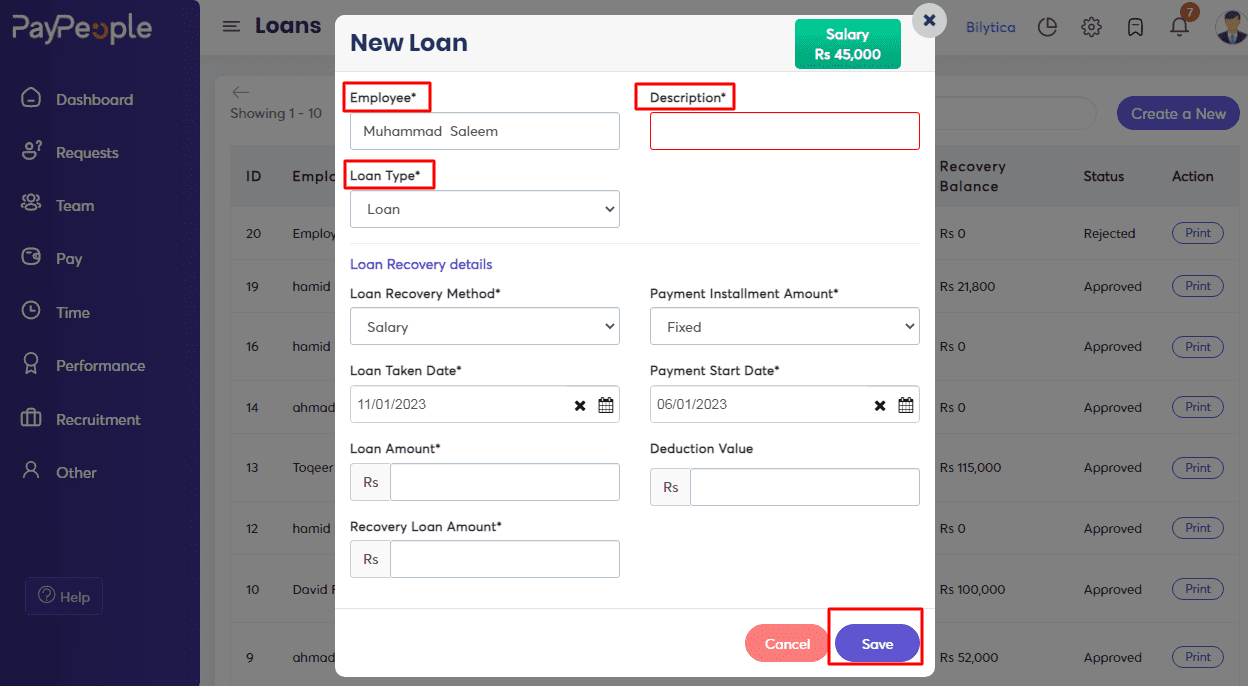
What we can do here:
- Search employees for which you want to add a loan, Advance, or provident funds. Then add the description.
- Select Loan, Advance, or Provident fund of loan type.
- Loan Recovery Method: Select the method of payment recovery whether to deduct from per month’s salary or by cash.
- Payment Installment Amount: Select the installment method in which you want to deduct the loan from the employee’s salary whether Fixed Amount Percentage of Basic Salary.
- Add Loan Taken Date & Payment Start Date.
- Enter the Loan Amount.
- Enter deduction value: If the deduction is in Percentage(%), enter the percentage value in the “Deduction Field” Alternatively, if you selected a fixed amount in the “Payment Installment Amount” section above, enter that amount.
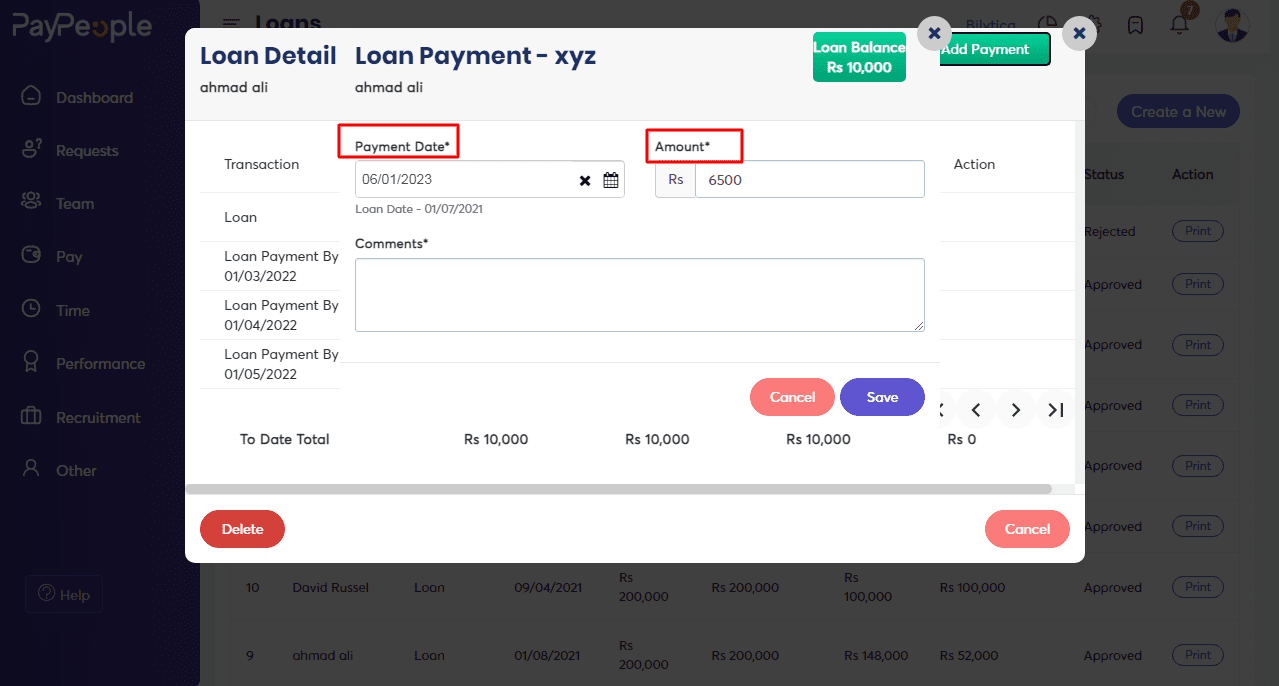
How to add Return Loan? #
- If any employee pays a sum that exceeds the installment amount deducted from his or her salary, add that sum to the loan balance using Add Payment.
- Click on “Add Payment” in the top right corner.
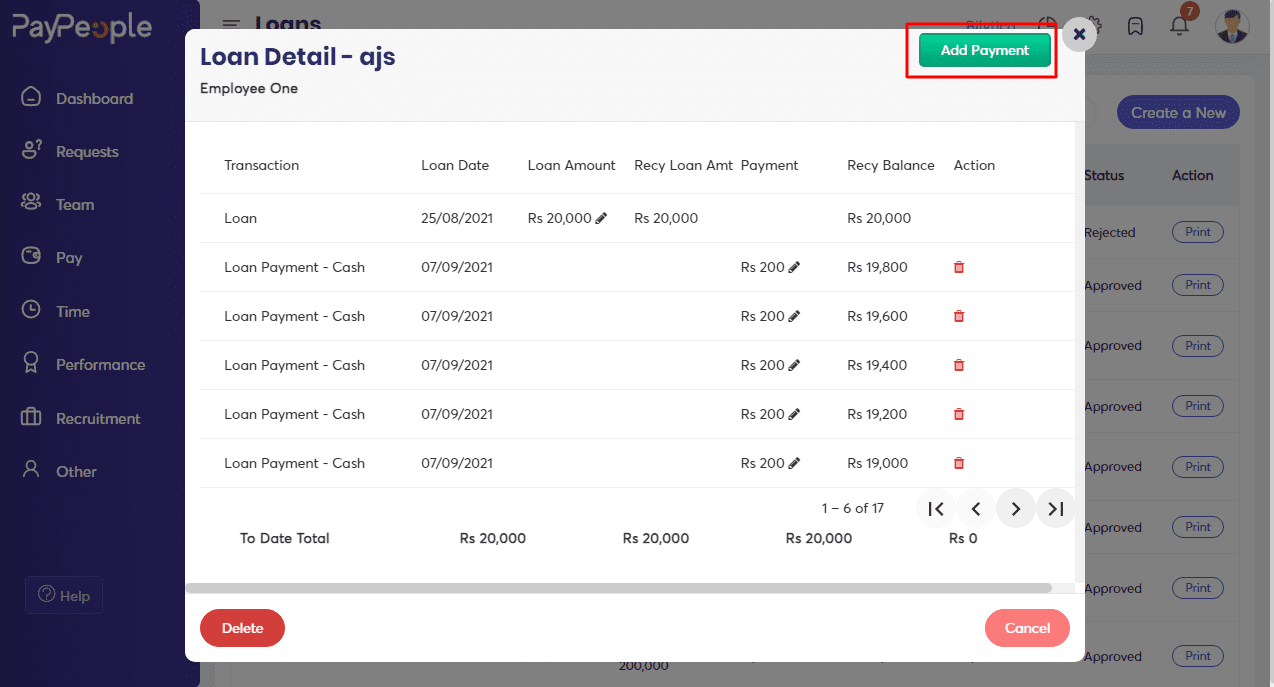
- You can add a date and an amount of installment here.
How to add Advance? #
Apply in the same way as a loan, but this time chooses advance for an advance salary or payment.
How to add Provident Fund? #
The method is the same as when applying for a loan or advance. You have two alternatives here if you choose the provident fund.
- Temporary
- Permanent
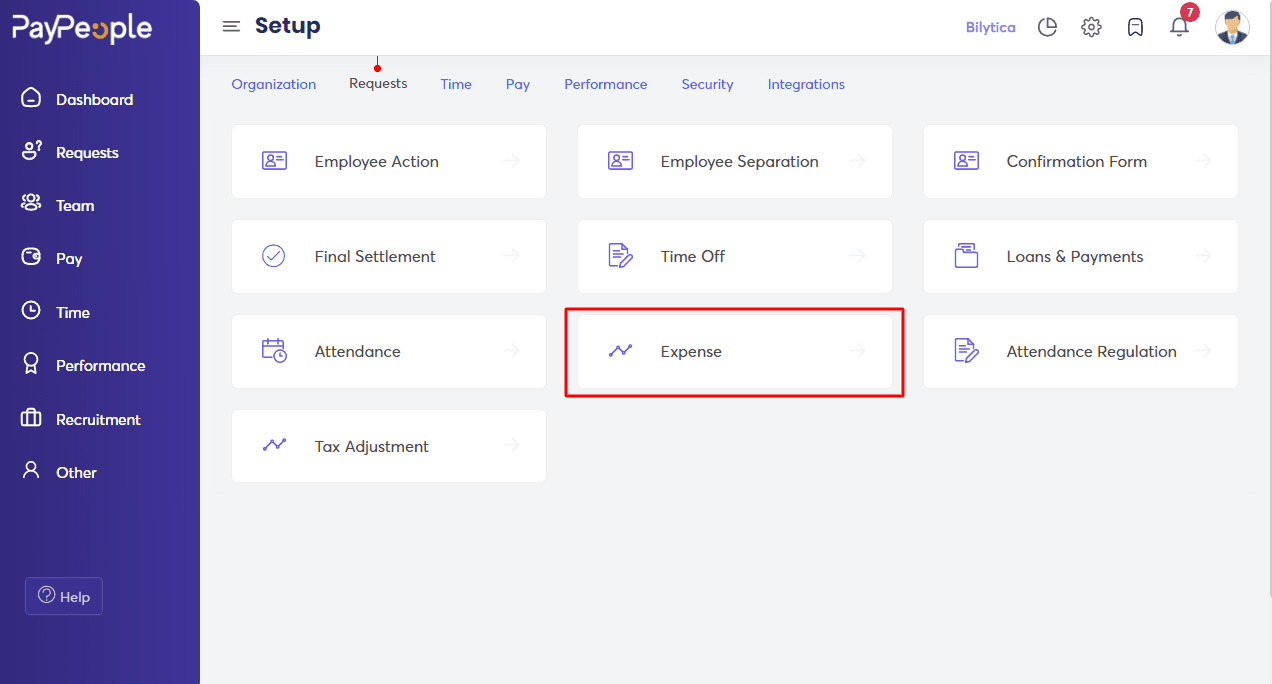
Expense #
You can submit an application for any expense here. Click on the expense option.
- Click on “Create a New” in the top right corner, for Expense Application.
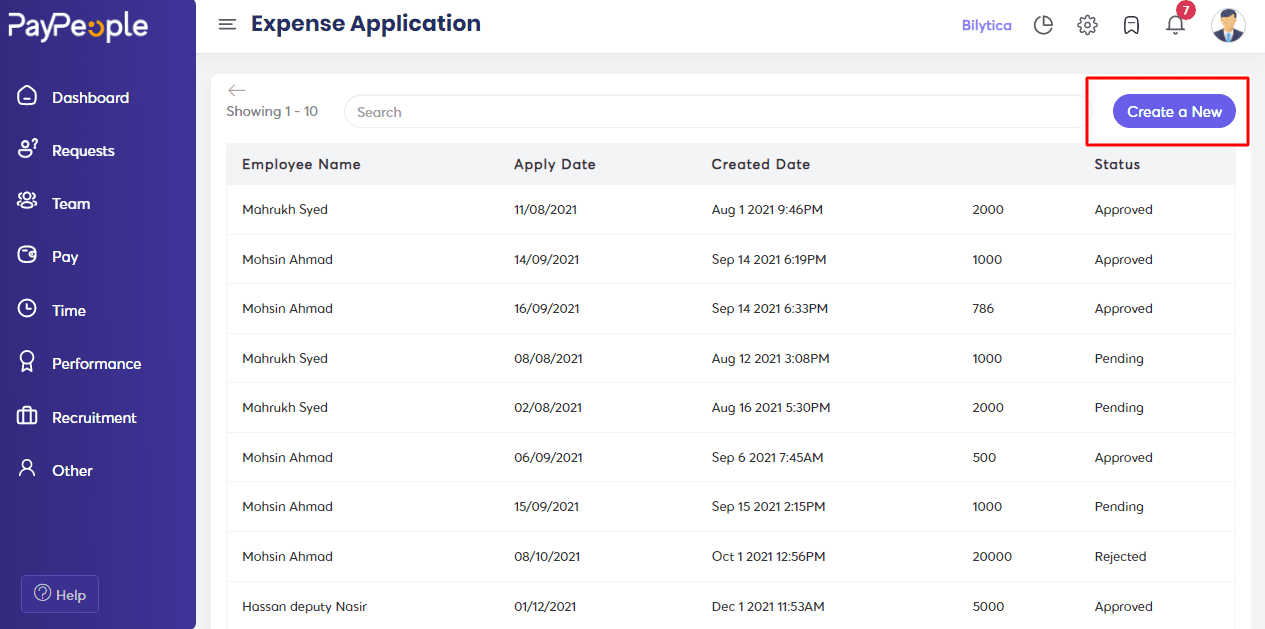
- Fill in the required fields that appear on the screen.
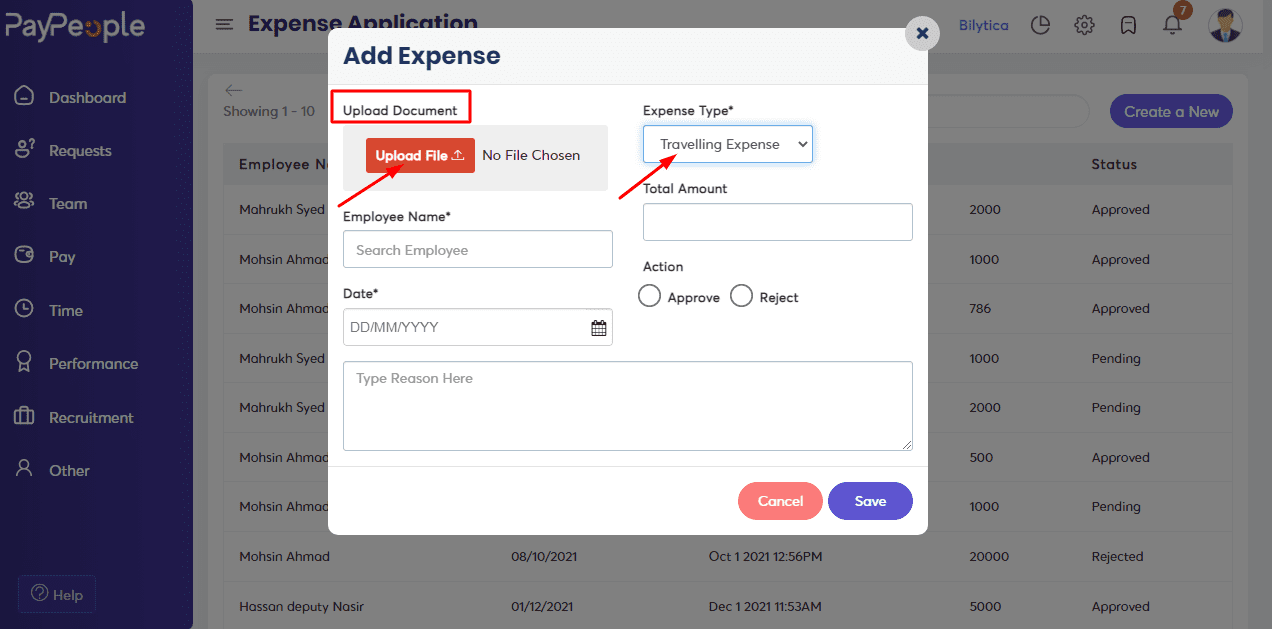
What we can do here:
- Upload document; containing relevant expenses such as a deposit slip, a bill, or a form.
- Expense Type: Secondly, under the Setting section, choose the expense type that you defined in Master Data.
- Employee name: In the employee name field, write the name of the employee who wants to take any expense.
- Total amount: Mention the whole amount of the expense in this field.
- Date: Have included the date that expense was issued in the date section.
- Action: Higher authorities take action on it, either Approve or Reject it.


