How to Create a Leave Type? #
PayPeople’s new leave type gives you an extensive platform to configure and customize various leave types to suit every organization’s needs. You can create specific leave types for working members in your organization.
To create leaves,
- Go to Setup > Time > Leave Type.
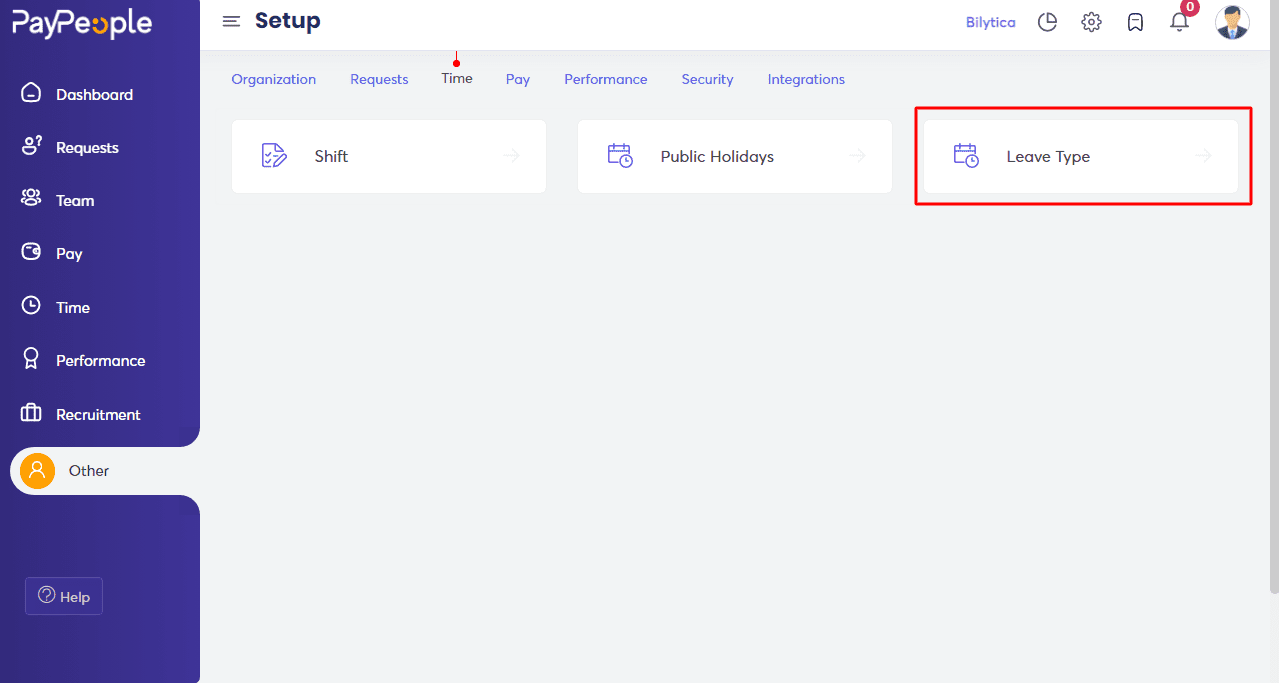
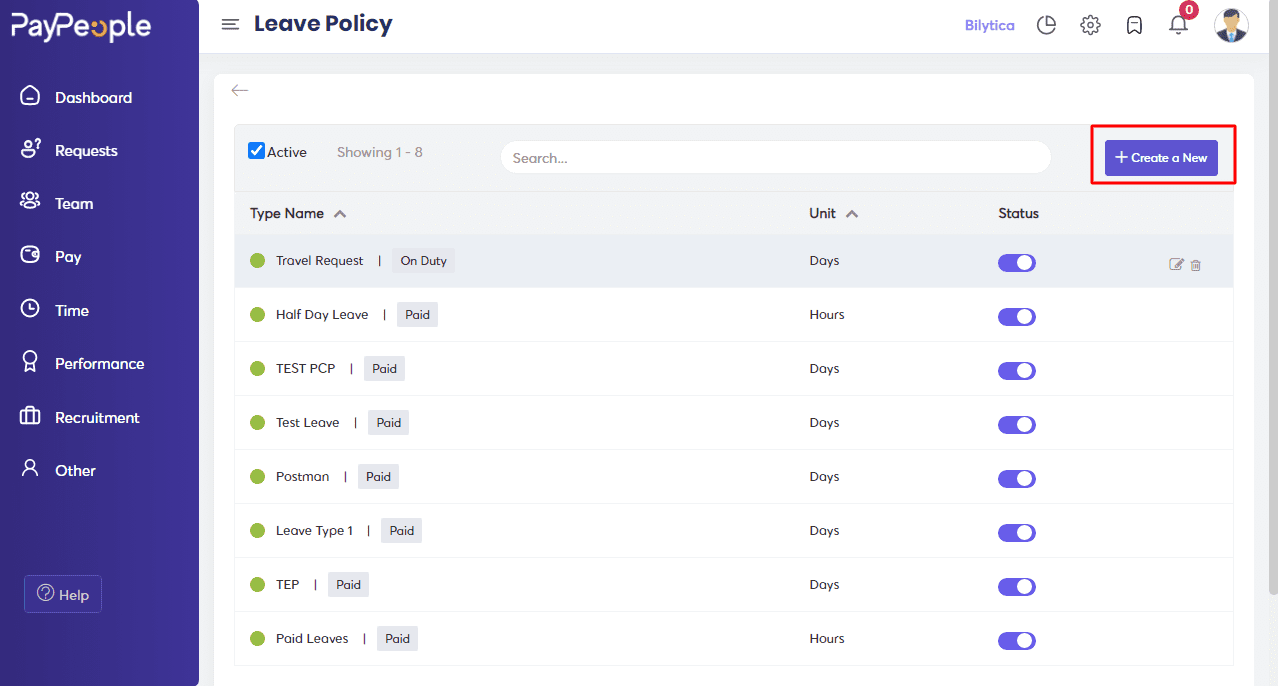
- Select “Create a new” to add a new leave type.
Fill in the required information and add your leave type.
- Give a Name, and Code – Code is a unique reference for the leave type. For eg, the code for Casual Leave can be given for CL for easy identification.
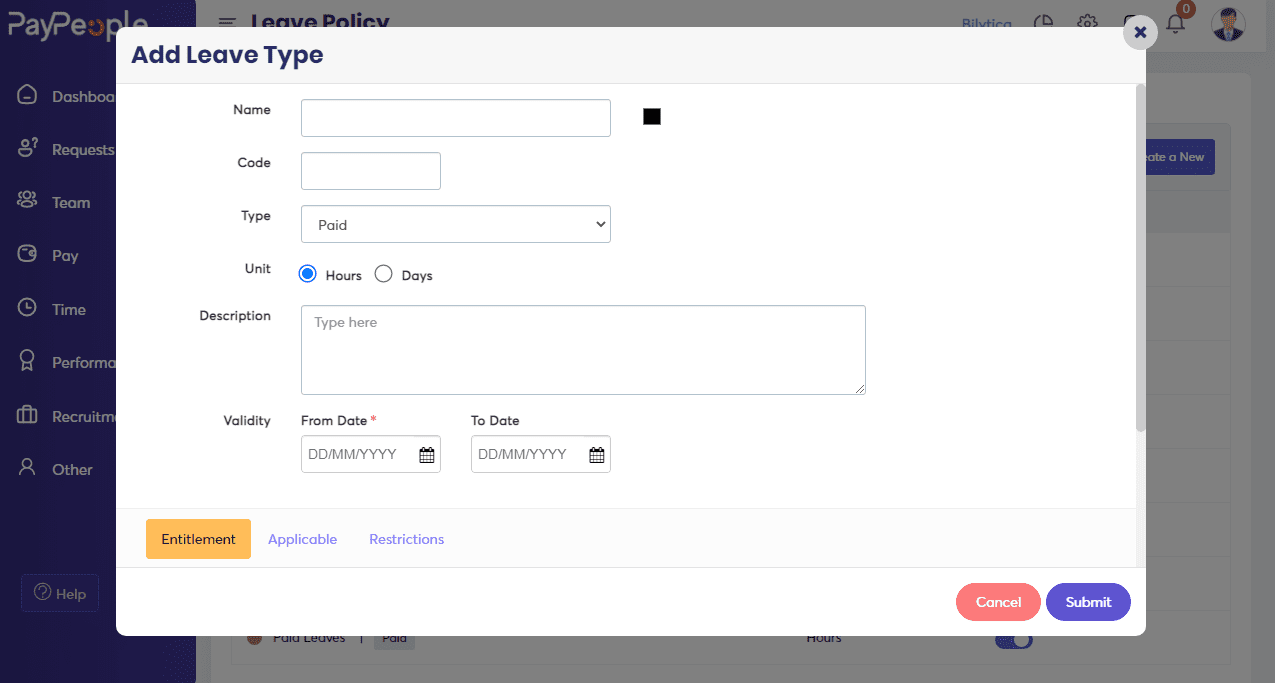
- Under Type, select whether the leave should be Paid or Unpaid, On Duty.
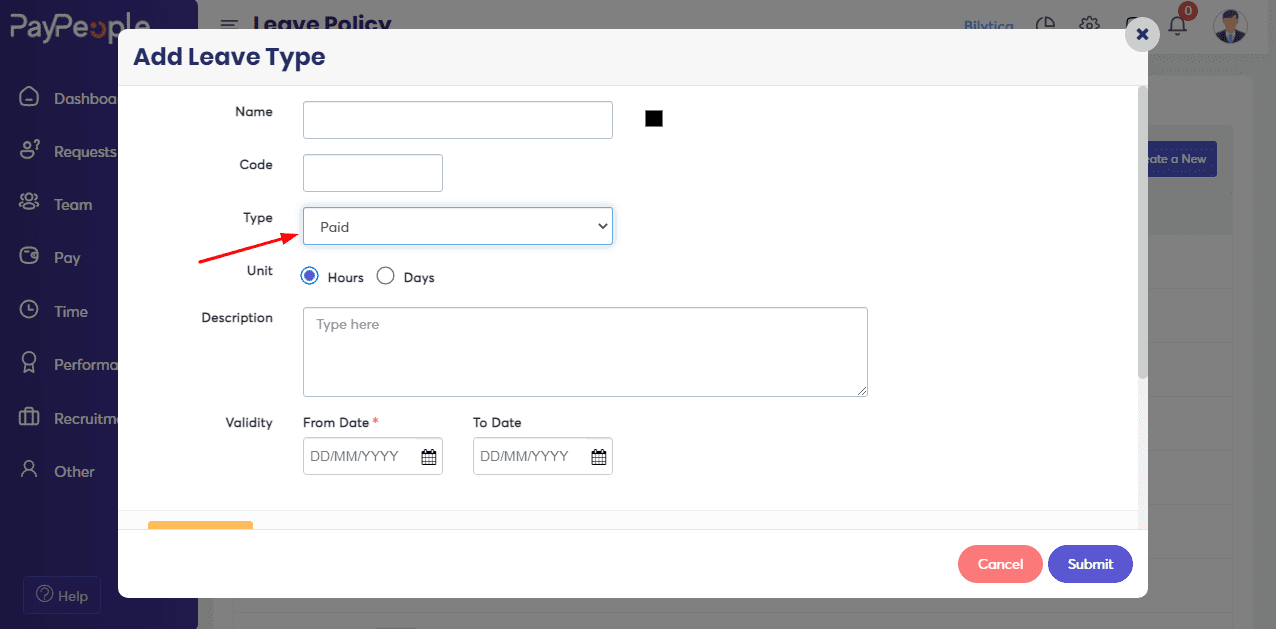
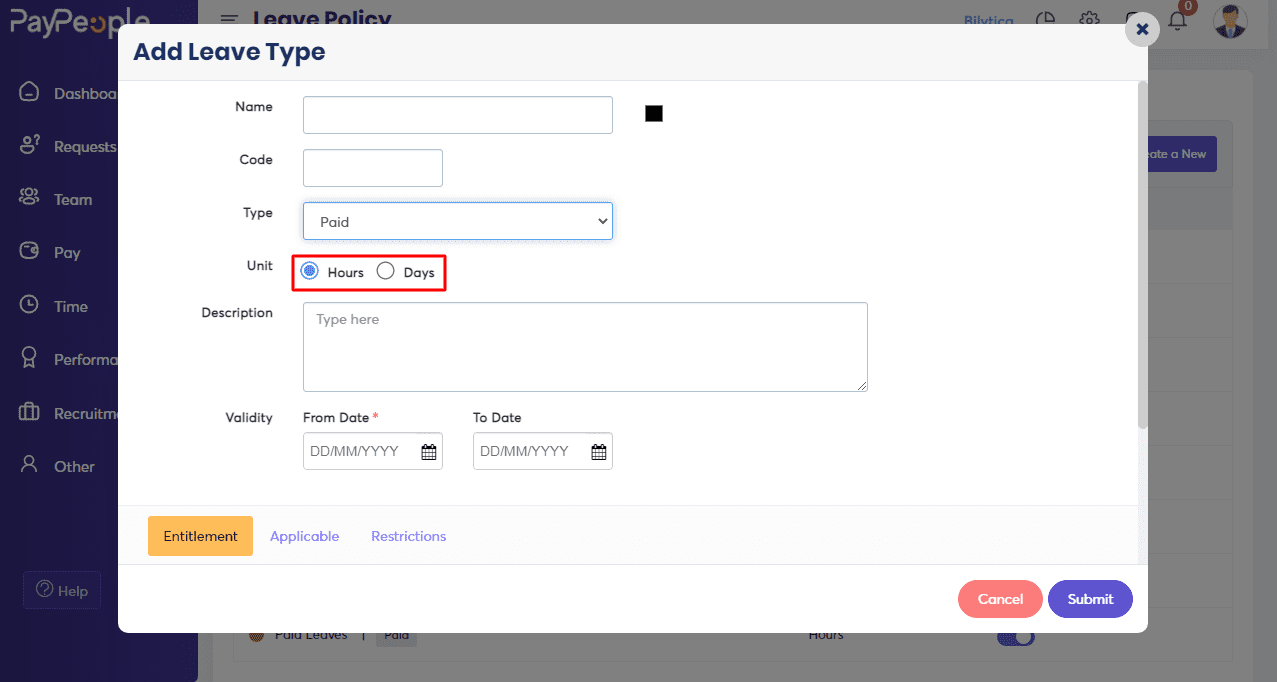
- Under Unit, select Days or Hours and give a description. The unit given here will form the basis for all the leave calculations. For example, if Hours is chosen then all configurations and reports will be in Hours.
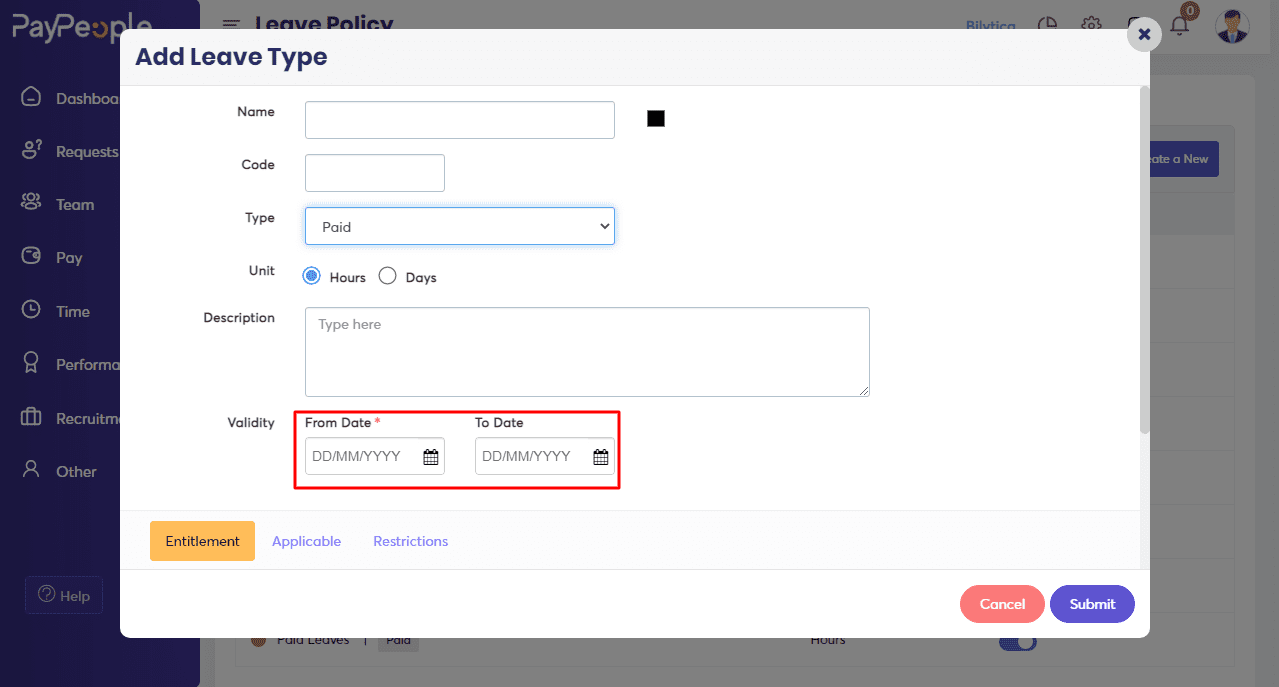
- Validity refers to the period for which the leave type is valid. The From date is mandatory for any leave type. If you do not want the leave type to expire, the To date field can be left blank. Reports for the organization will be generated from this date.
How to Configure Advance Leave Policies? #
- The leave type comes with various advanced options such as Entitlement, Applicable, and Restrictions, which can make your leave dynamic and flexible. A leave policy can even be customized exclusively to a specific employee. Let us look at the important features in configuring a new leave type.
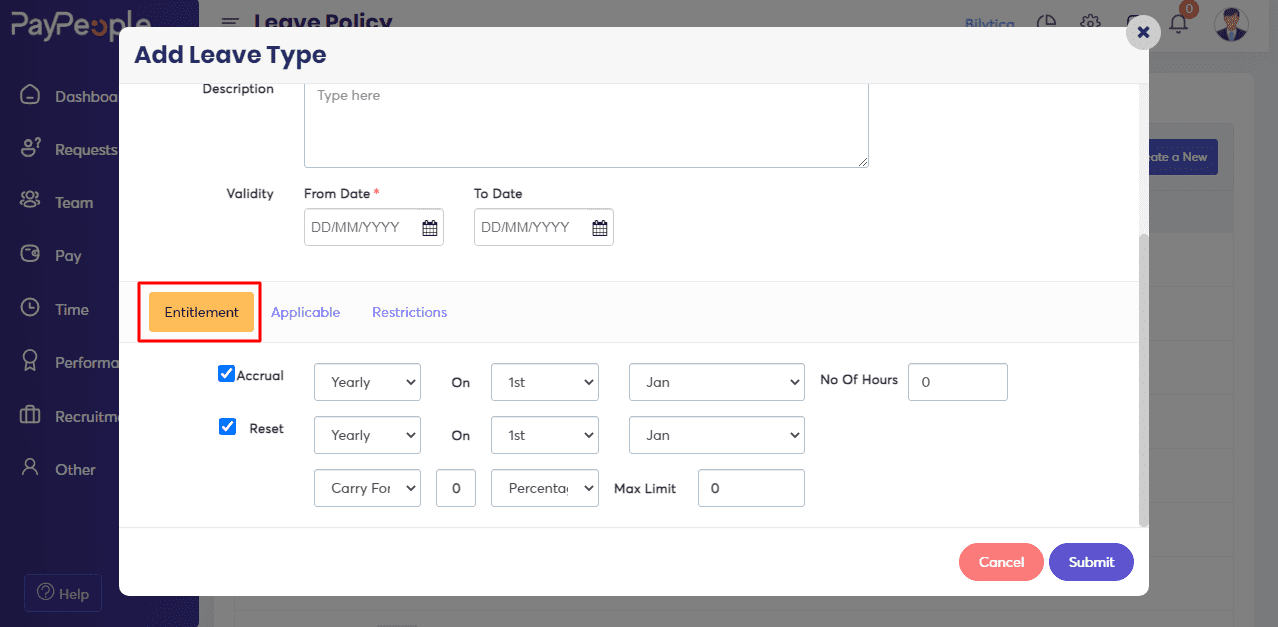
Entitlement #
- In this section, we define how much leave gets credited to an employee using various options such as accrual and reset. You can also use entitlement when you would like to differentiate the amount of leave for each employee based on their years of experience.
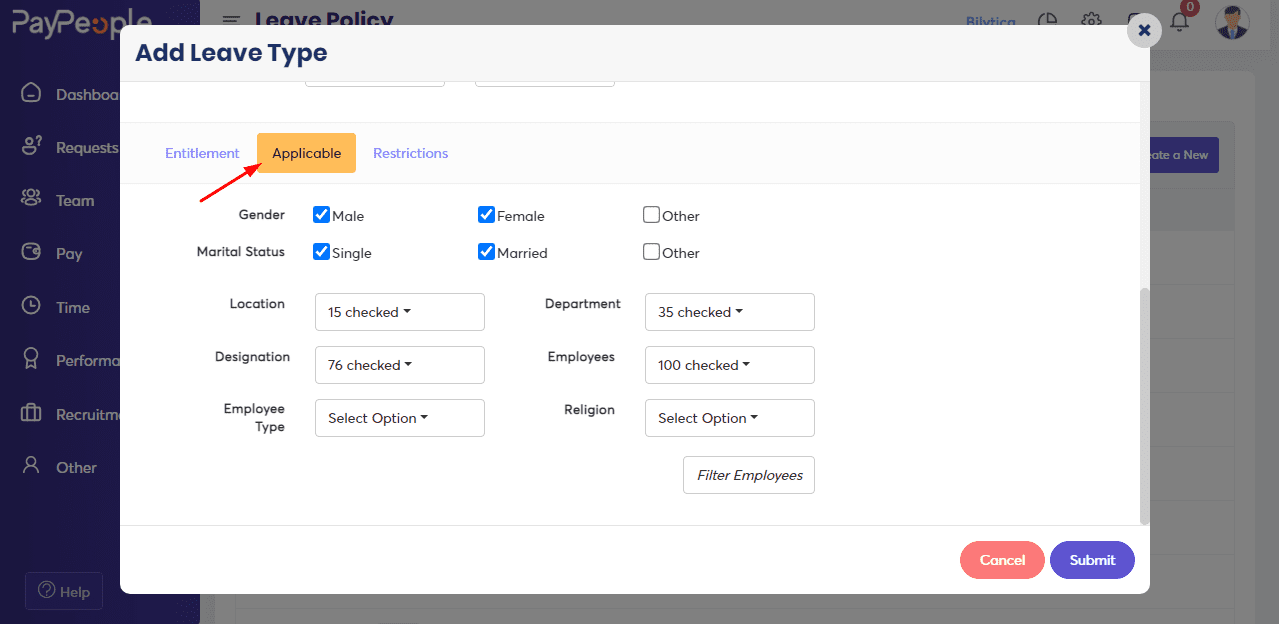
Applicable #
- Select ‘Applicable’, Define the period by which the leave would be effective.
Effective After –The period after which the policy is applicable. The set period can be from either the Date of Joining or the Date of Confirmation.
Example 1: If your organization wanted to credit casual leaves to an employee after two months of joining, you’d select, 2 Months, and from the date of Joining.
Example 2: If your organization wants credit privilege leave for employees only after six months of their employment confirmation, then you’d select, 6 Months from the Date of Confirmation.
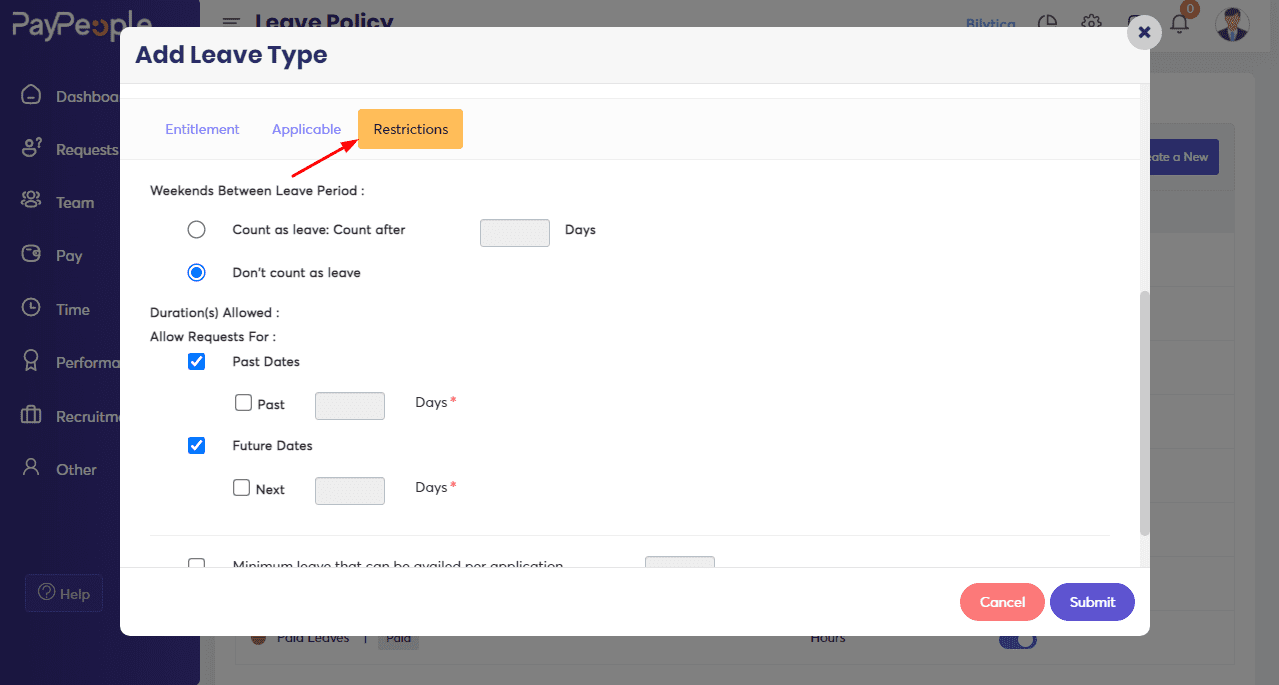
Restrictions #
- In this section, we can further refine the leave by imposing various restrictions.